
Teaching my boys to use AI
I’ve always been a MAKER. There’s something special about creating devices with your own hands, seeing them come to life and solving real problems. My maker journey took on a whole new focus when I became a dad.
It started simple enough, first a GPS tracker (for when we were at Disney), then a two-button emergency cell phone (if the school bus was late or broke down). As the boys grew, the gadgets they needed changed.
My interest in AI isn’t just a hobby—it’s become an integral part of my daily life. I frequently use both ChatGPT and Claude 3.5 Sonnet for various tasks. Everything from work-related problem-solving, to home repair projects, and general knowledge queries. Not only have these answered many questions for me but they have taught me an incredible amount in the last year. This regular interaction with AI tools made me realize their potential as learning aids for my boys.

My idea was to create a device that could use AI in a way that’s both engaging and educational for kids. I wanted to replicate the “chat interface” experience I get with tools like ChatGPT, but in a simple format tailored for younger users. Something like a phone device that they could have “chat” conversations with while practicing reading and writing.
This meant I needed to design an easy-to-use device that could:
- Start new conversations on any topic
- Recall and continue previous topic threads
- Provide age-appropriate responses
- Encourage reading and writing skills
A crucial aspect of this project was maintaining the conversation threads. Unlike some other Arduino query-response projects dealing with ChatGPT, I wanted my kids to have the ability to engage in ongoing dialogues, deepening their understanding of topics over time.
By combining portable hardware capabilities with the power of OpenAI’s Assistants API, I saw an opportunity to create a unique learning tool. This device wouldn’t just answer questions; it would engage my sons in thoughtful conversations, encourage follow-up questions, and adapt to their individual communication styles and interests.
The goal was to create more than just another gadget. I wanted a tool that would spark curiosity, improve their reading and writing skills, and teach them how to ask good questions. I wanted to train them to use AI as a tool, because I see that as an important skill going forward.
The core of this project builds upon another project called ESP32Berry done by Github/YouTube genius That Project. His ESP32Berry project was enough to get me started and build on his initial connection to OpenAI API’s and start using LVGL (for the snappy ui). Learn more on That Project’s YouTube page
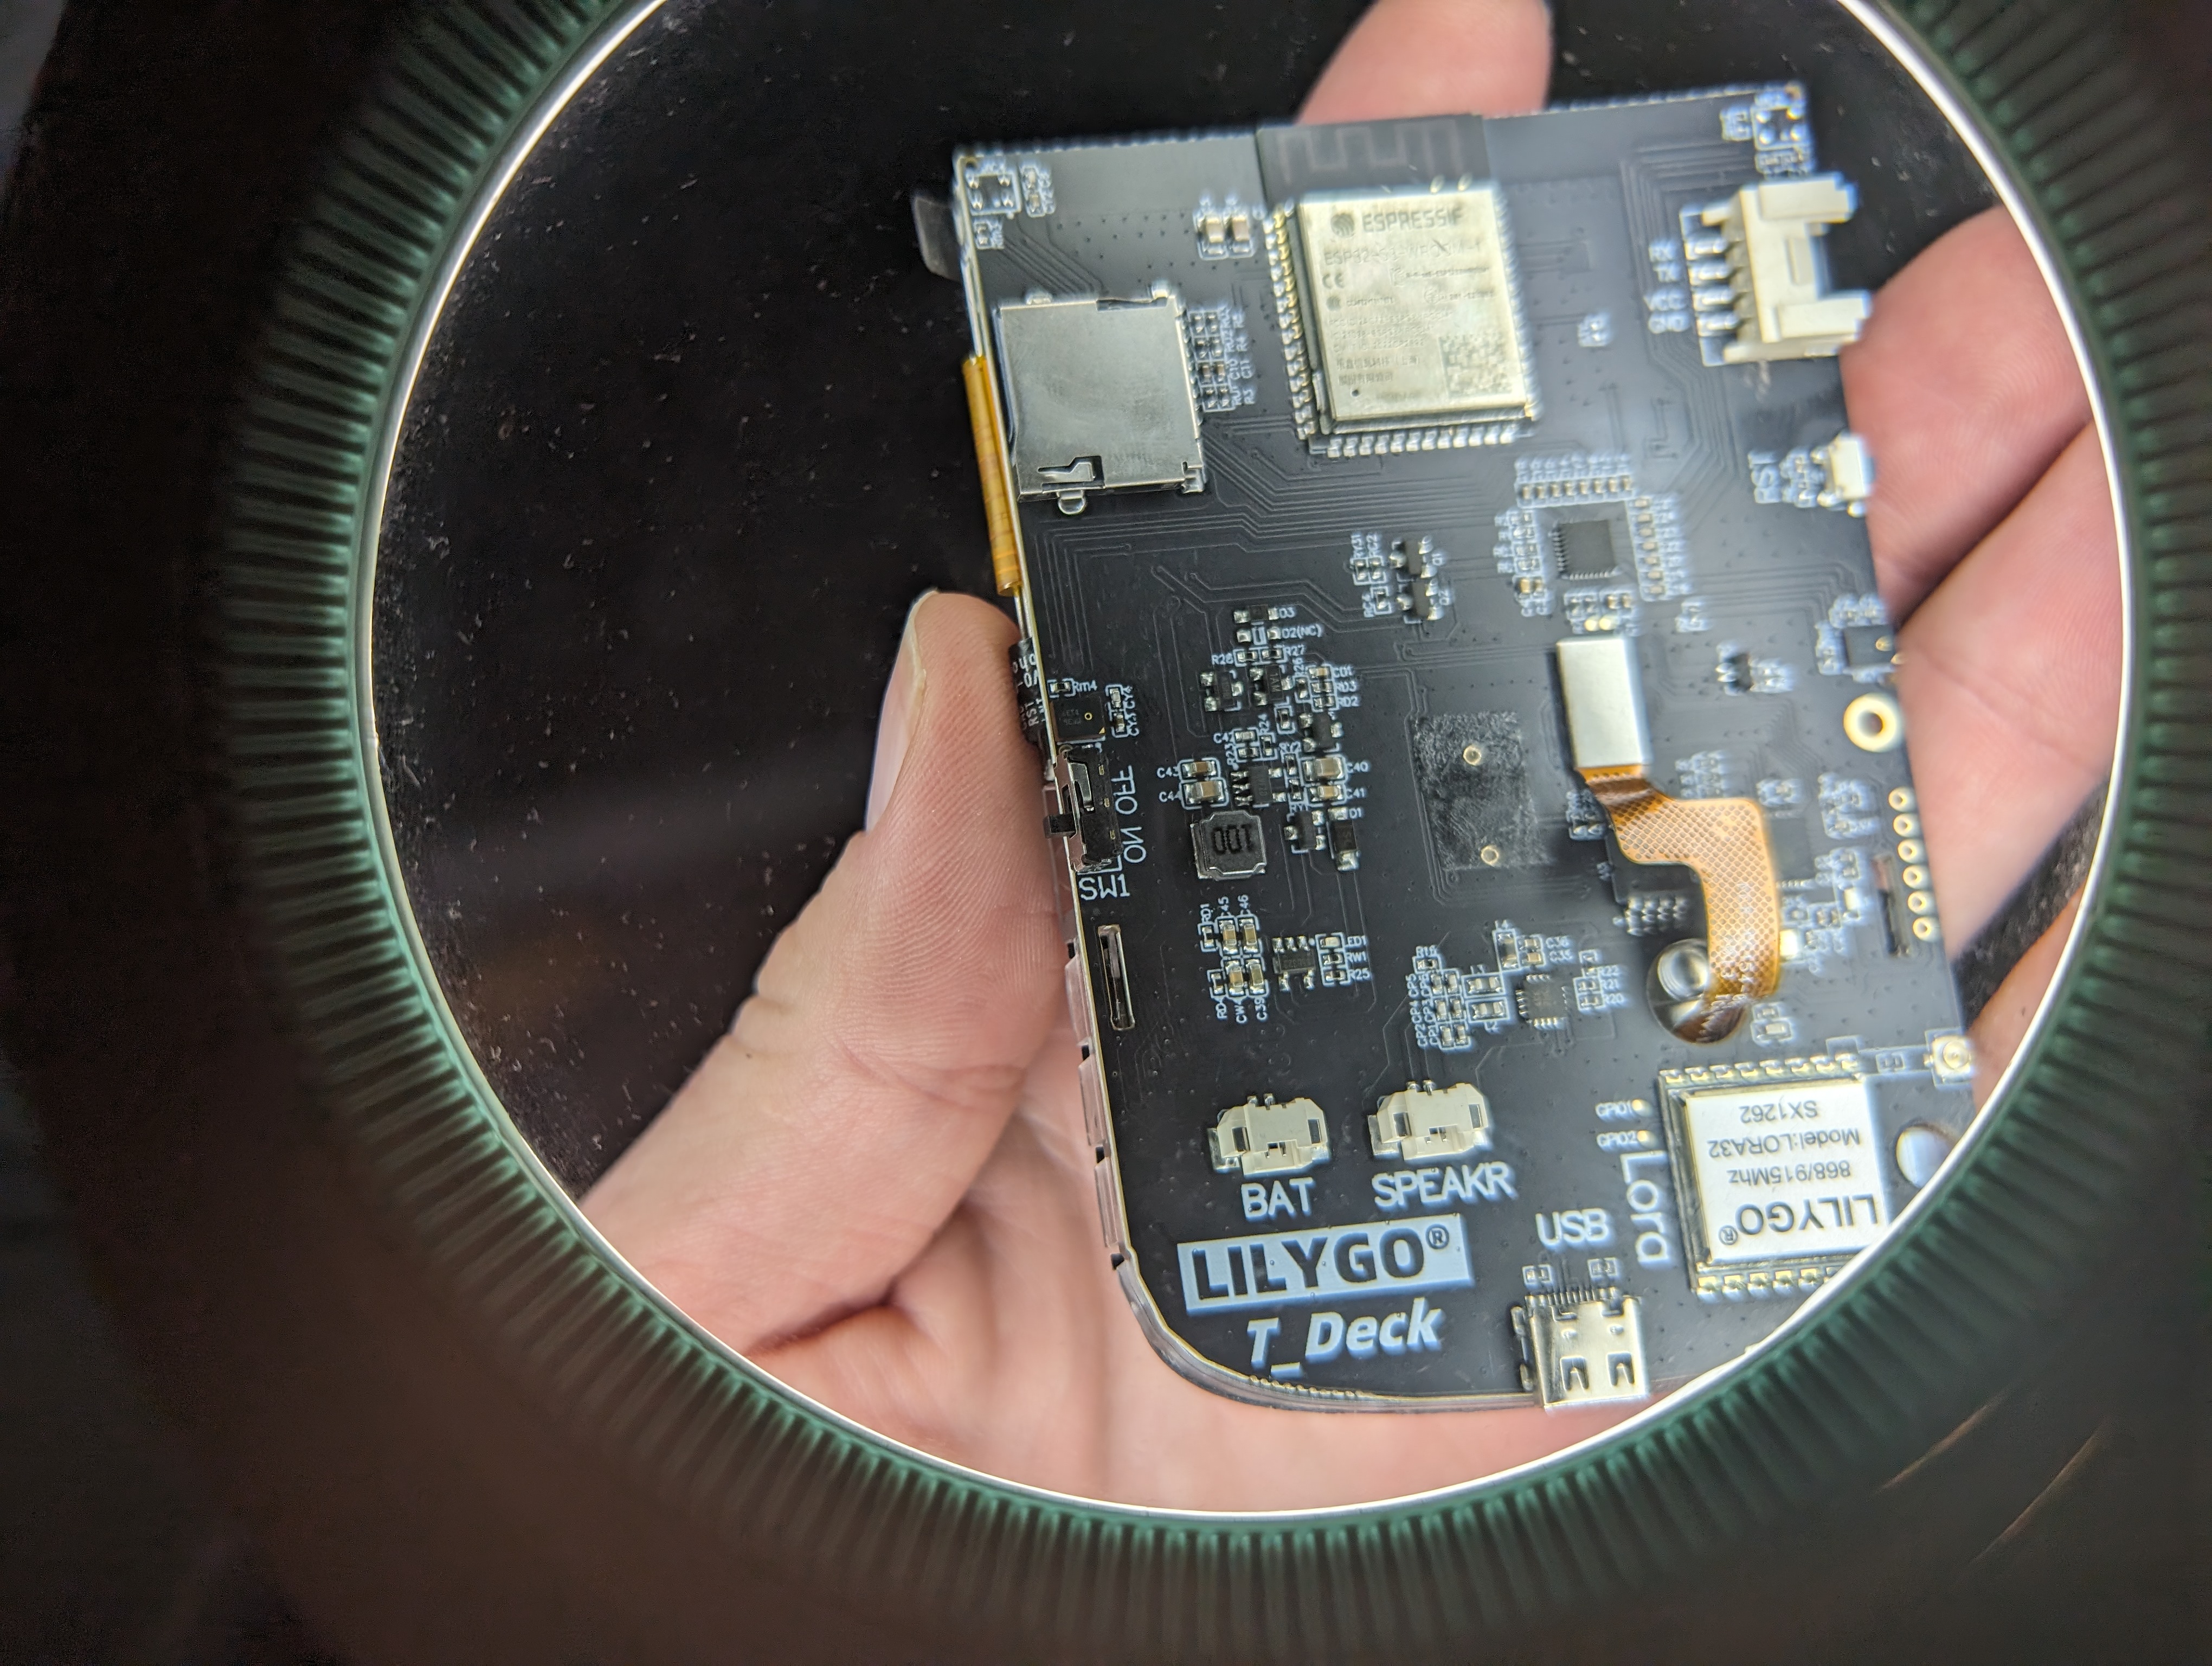
The Hardware: LilyGo T-Deck

After considering various options, I settled on the LilyGo T-Deck (docs) as the hardware platform for this project. My previous experience with the LilyGo T-Screen had been positive, and the T-Deck offered several advantages that made it ideal for a portable AI device. It actually comes WITHOUT a case, but that gave me a lot of flexibility when it came to the final design.
Key Features of the T-Deck:
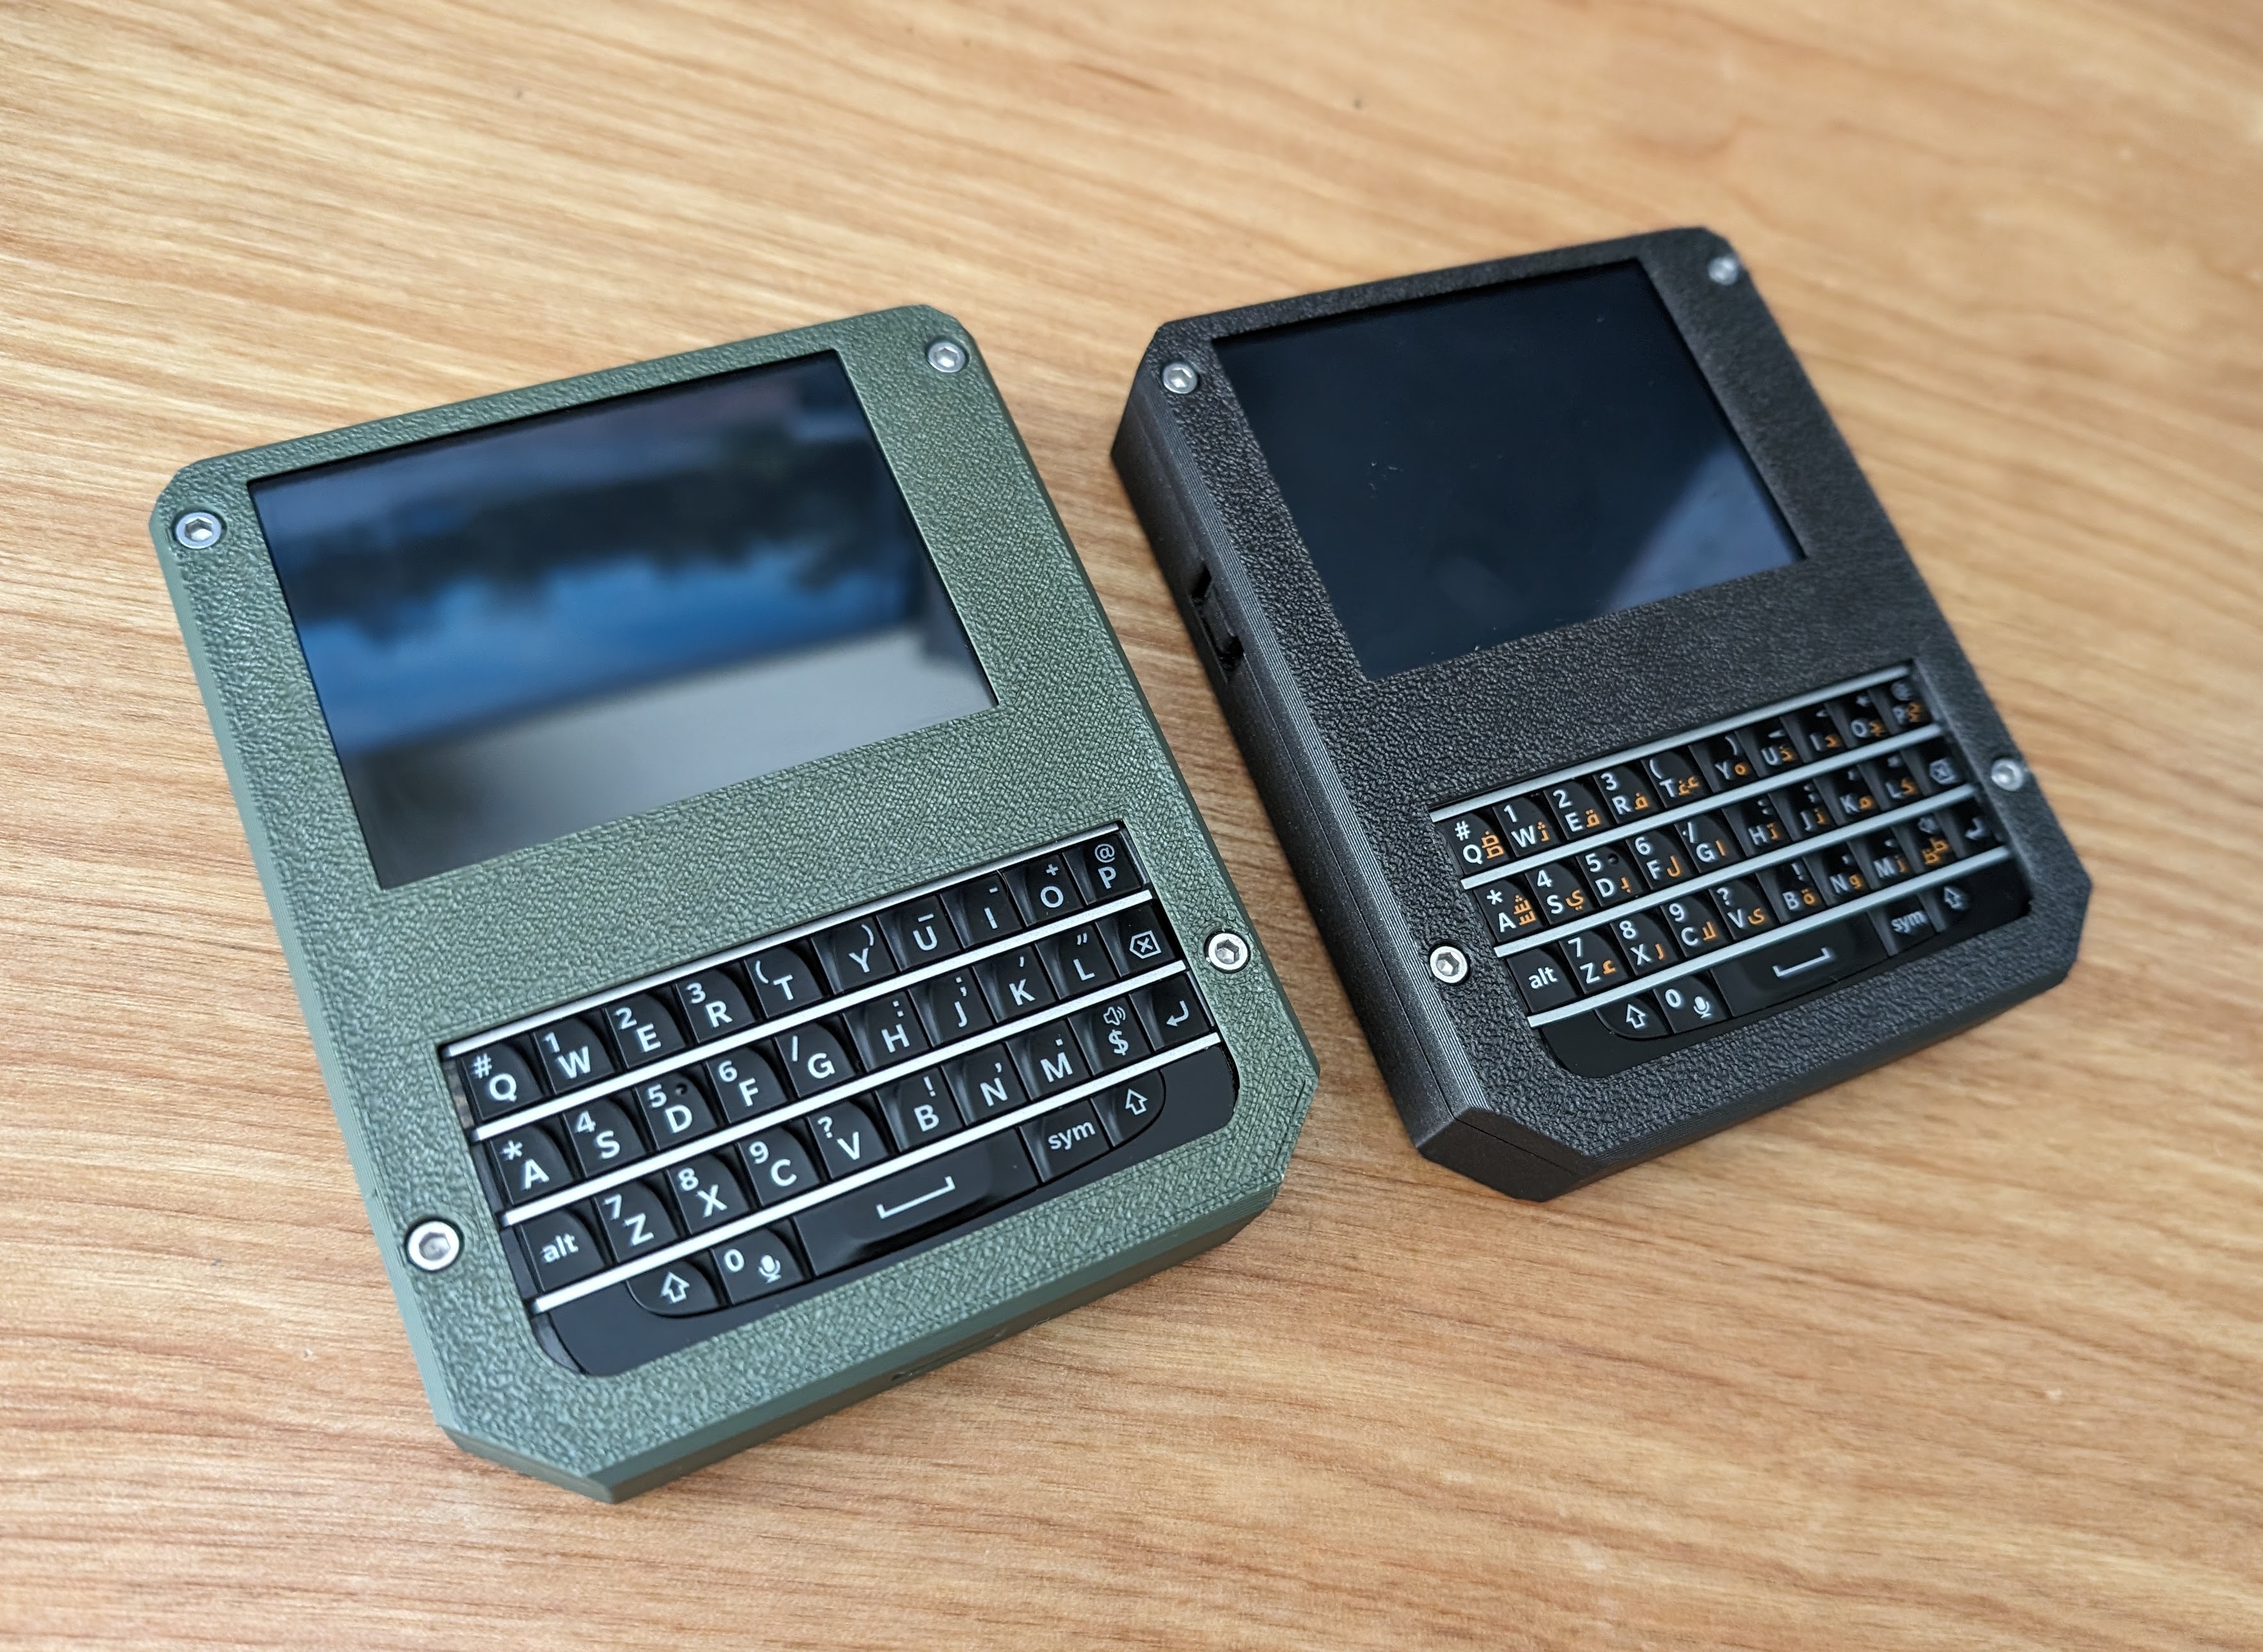
- Integrated 2.8" touchscreen display
- Full Blackberry-style QWERTY keyboard
- ESP32 processor with built-in WiFi capabilities
- microSD card slot for storage
- Onboard battery connector
- Compact size suitable for children’s hands
One of the standout features of this setup is its quick boot time. The device powers on in just 3 seconds, with full internet connectivity established in 6 seconds. This rapid startup is crucial for maintaining children’s interest and allowing for spontaneous use.
The integrated keyboard is a key feature for this project. It allows the kids to type their questions and responses naturally, improving their typing skills while interacting with the AI. The touchscreen adds an extra layer of interactivity, making the device feel more engaging and modern.
The microSD card slot is another critical component. It allows for local storage of conversation threads, enabling the device to maintain context across multiple sessions without relying on constant internet connectivity.
At a retail price of about $50 USD, the T-Deck offers an excellent balance of features and affordability. This makes it a viable option not just for personal projects, but potentially for broader educational applications.
While the T-Deck isn’t specifically designed as a children’s device, its robust construction and simple design make it well-suited for this application. The addition of a custom 3D-printed case (discussed later) further adapted it for younger users.
OpenAI API: The PocketGPT Brain
At the heart of our kid-friendly AI device lies its most crucial component: the integration with OpenAI’s powerful language models. This is where the magic happens, transforming our hardware from a simple handheld device into an interactive learning companion.
I custom built a client that connects to OpenAI’s Assistants API, a decision that proved to be a game-changer. Unlike the more commonly used Chat Completions API, the Assistants API offers a key feature that’s perfect for this use case: persistent conversation threads. This means our little device can pick up right where it left off, maintaining context across multiple interactions – just like a real tutor would.
Implementing this wasn’t just a matter of making API calls, though. Using the OpenAI Assistants also allows me to create a persona that I could adjust as necessary. With that persona definition I also get built-in censoring and the ability carefully craft a prompt that would ensure child-friendly word usage and interactions. Here’s a snippet of the prompt I am currently using for my oldest son (age 10):

This is just a snippet of my custom prompt but it serves as a foundation, guiding the AI to interact in a way that’s engaging and educational for my young users.
It’s a delicate balance – I wanted to encourage learning and exploration, but also ensure the content remains appropriate and understandable for middle schoolers. If it uses words beyond their comprehension level, they wont use it. It has to be fun and speak directly to them.
One of the most exciting aspects of using the Assistants API is that by using threads and the Assistant prompt I limited the payload and memory requirements. By maintaining conversation threads on OpenAI’s servers, I significantly reduce the amount of data we need to send with each interaction. This not only keeps costs down but also improves response times, making for a snappier, more enjoyable user experience. Having to pass just the next question back each time also allows me to get the interaction working on this low memory device.
Basic Software
Other than writing the OpenAI Assistant client, I also had to build the UI using the Light and Versatile Graphics Library (LVGL). Since I am not an expert in LVGL I decided to first build a Custom LVGL GPT so I could ease into the learning of how to do things in LVGL. It basically taught me to use LVGL just by me asking it “how do i…” questions. If anyone is interested it is trained on the documentation and it helped me a ton on this project because it allowed me to ask all the dumb noob questions.
More about LVGL (runs on any micro that can run a display)
I used this GPT to understand and extend the existing code and gradually customized the UI for a more child-friendly AI interactions.

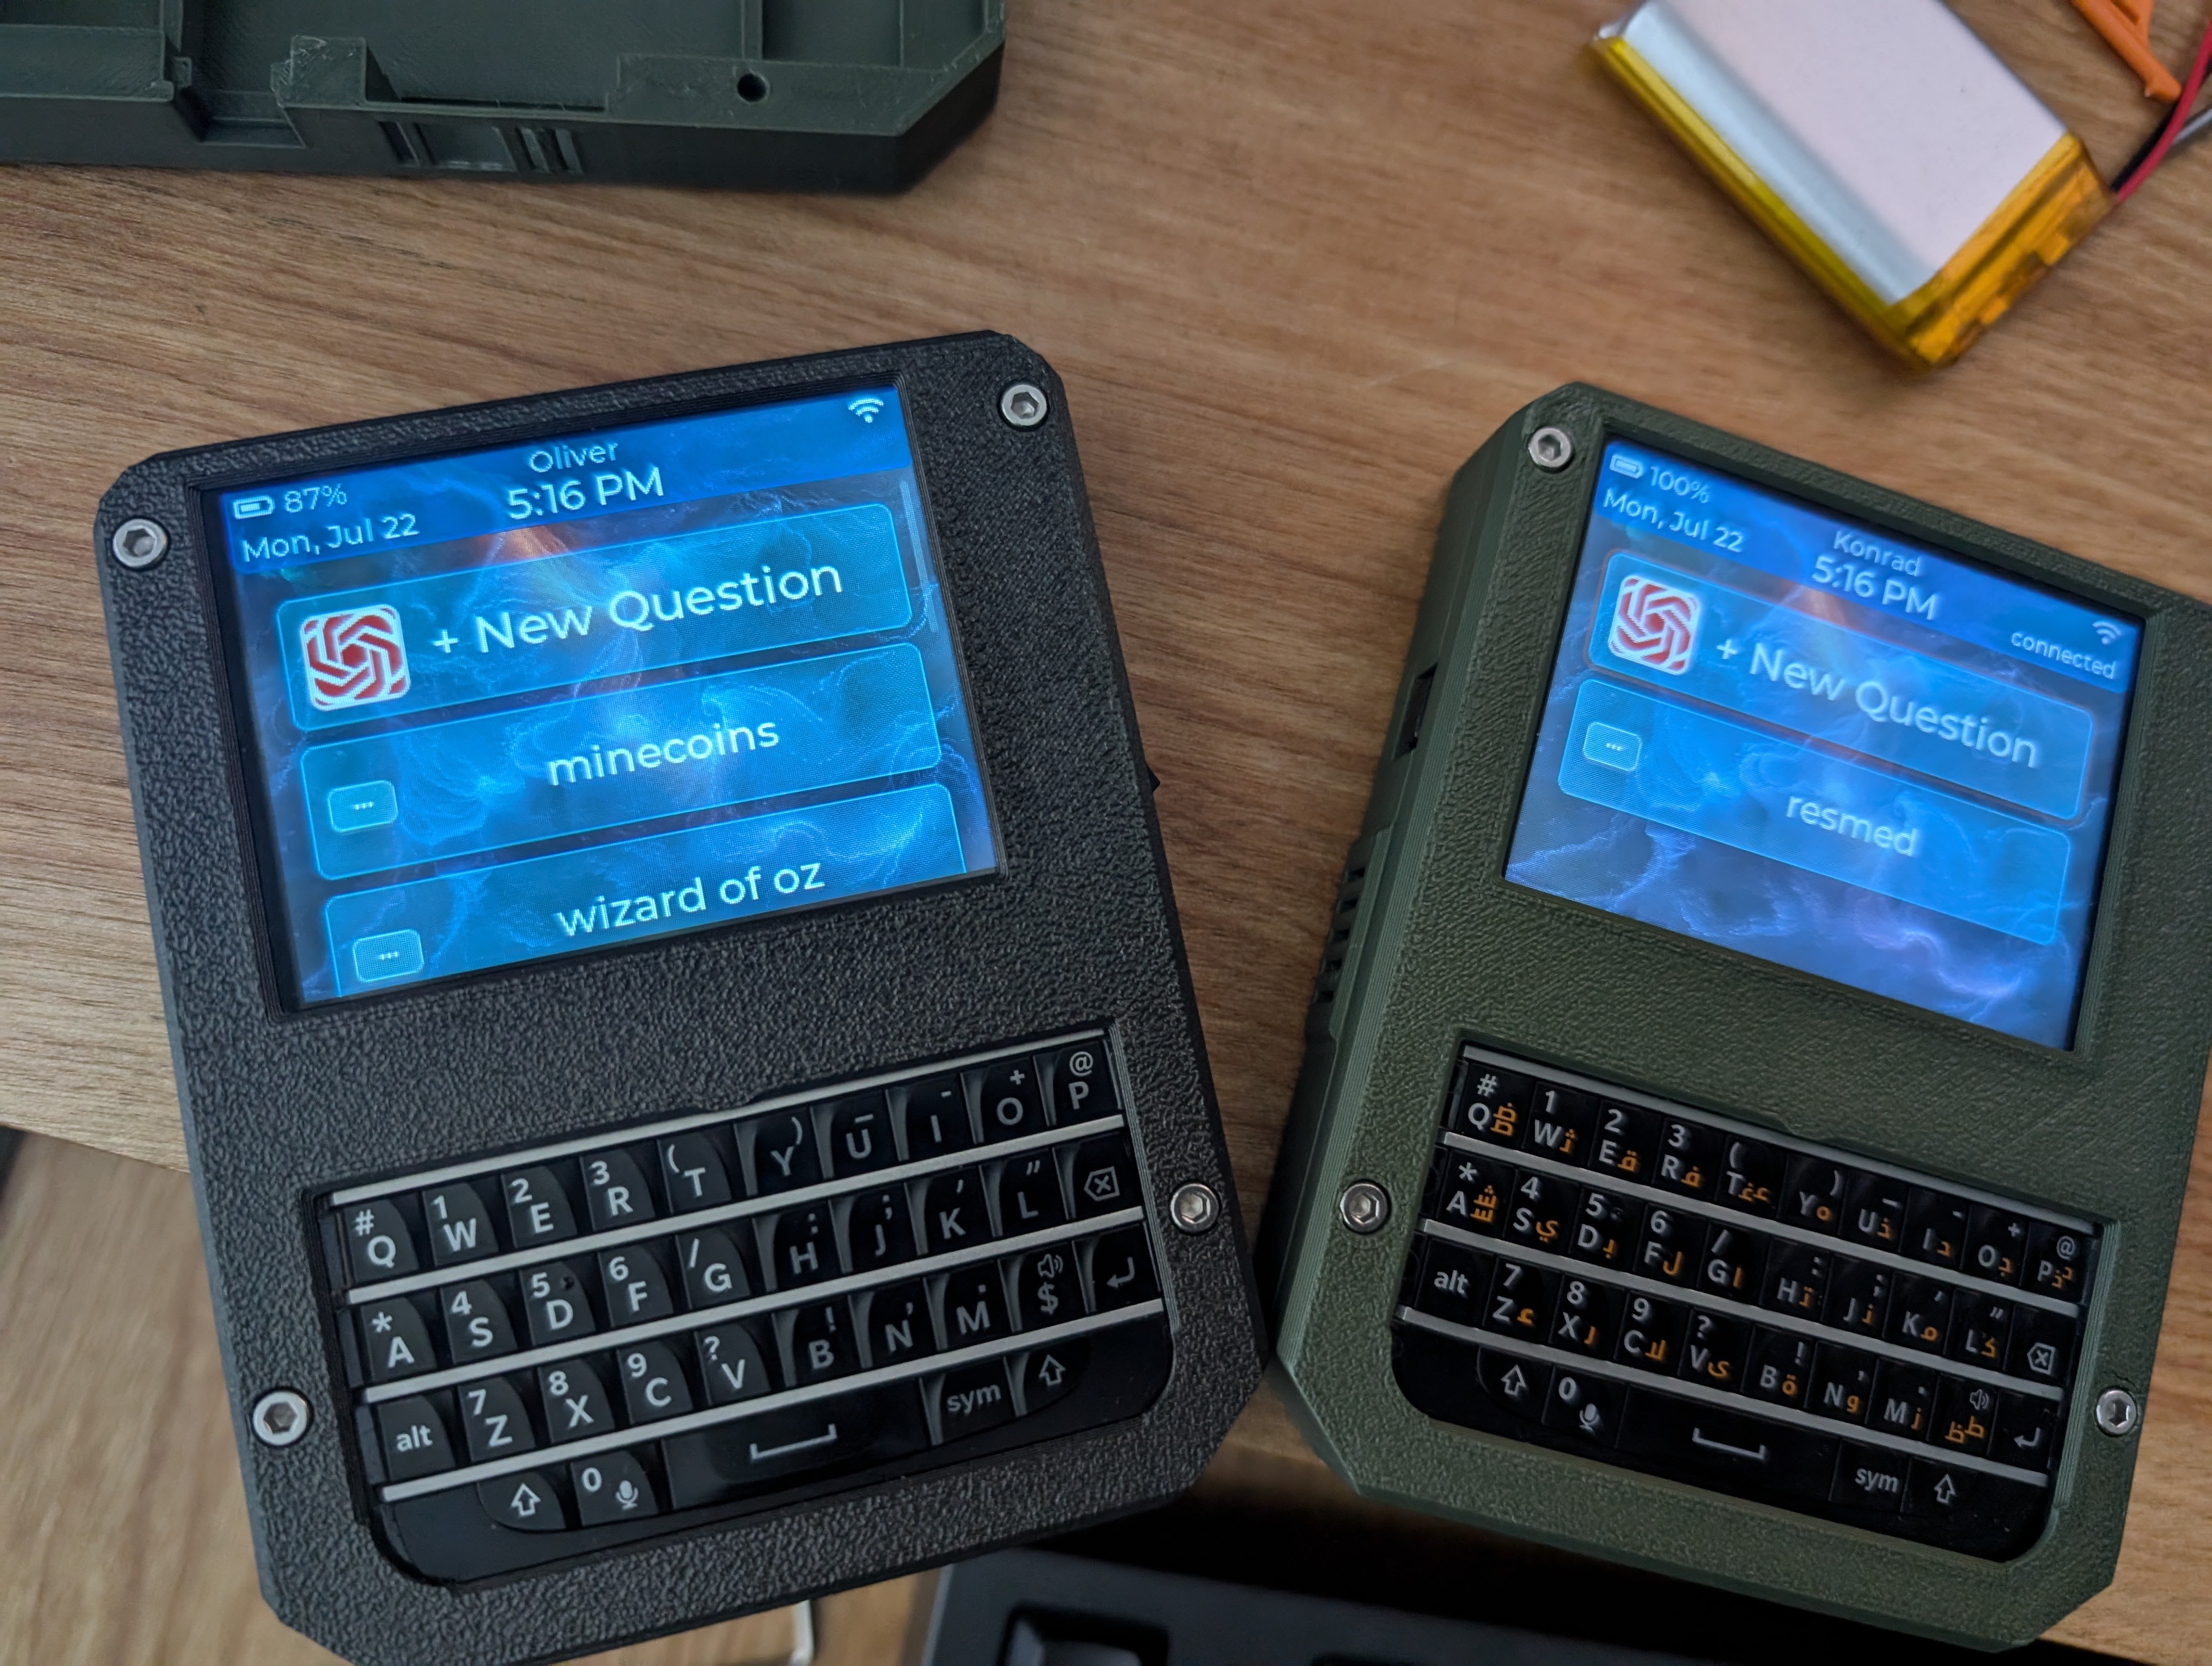
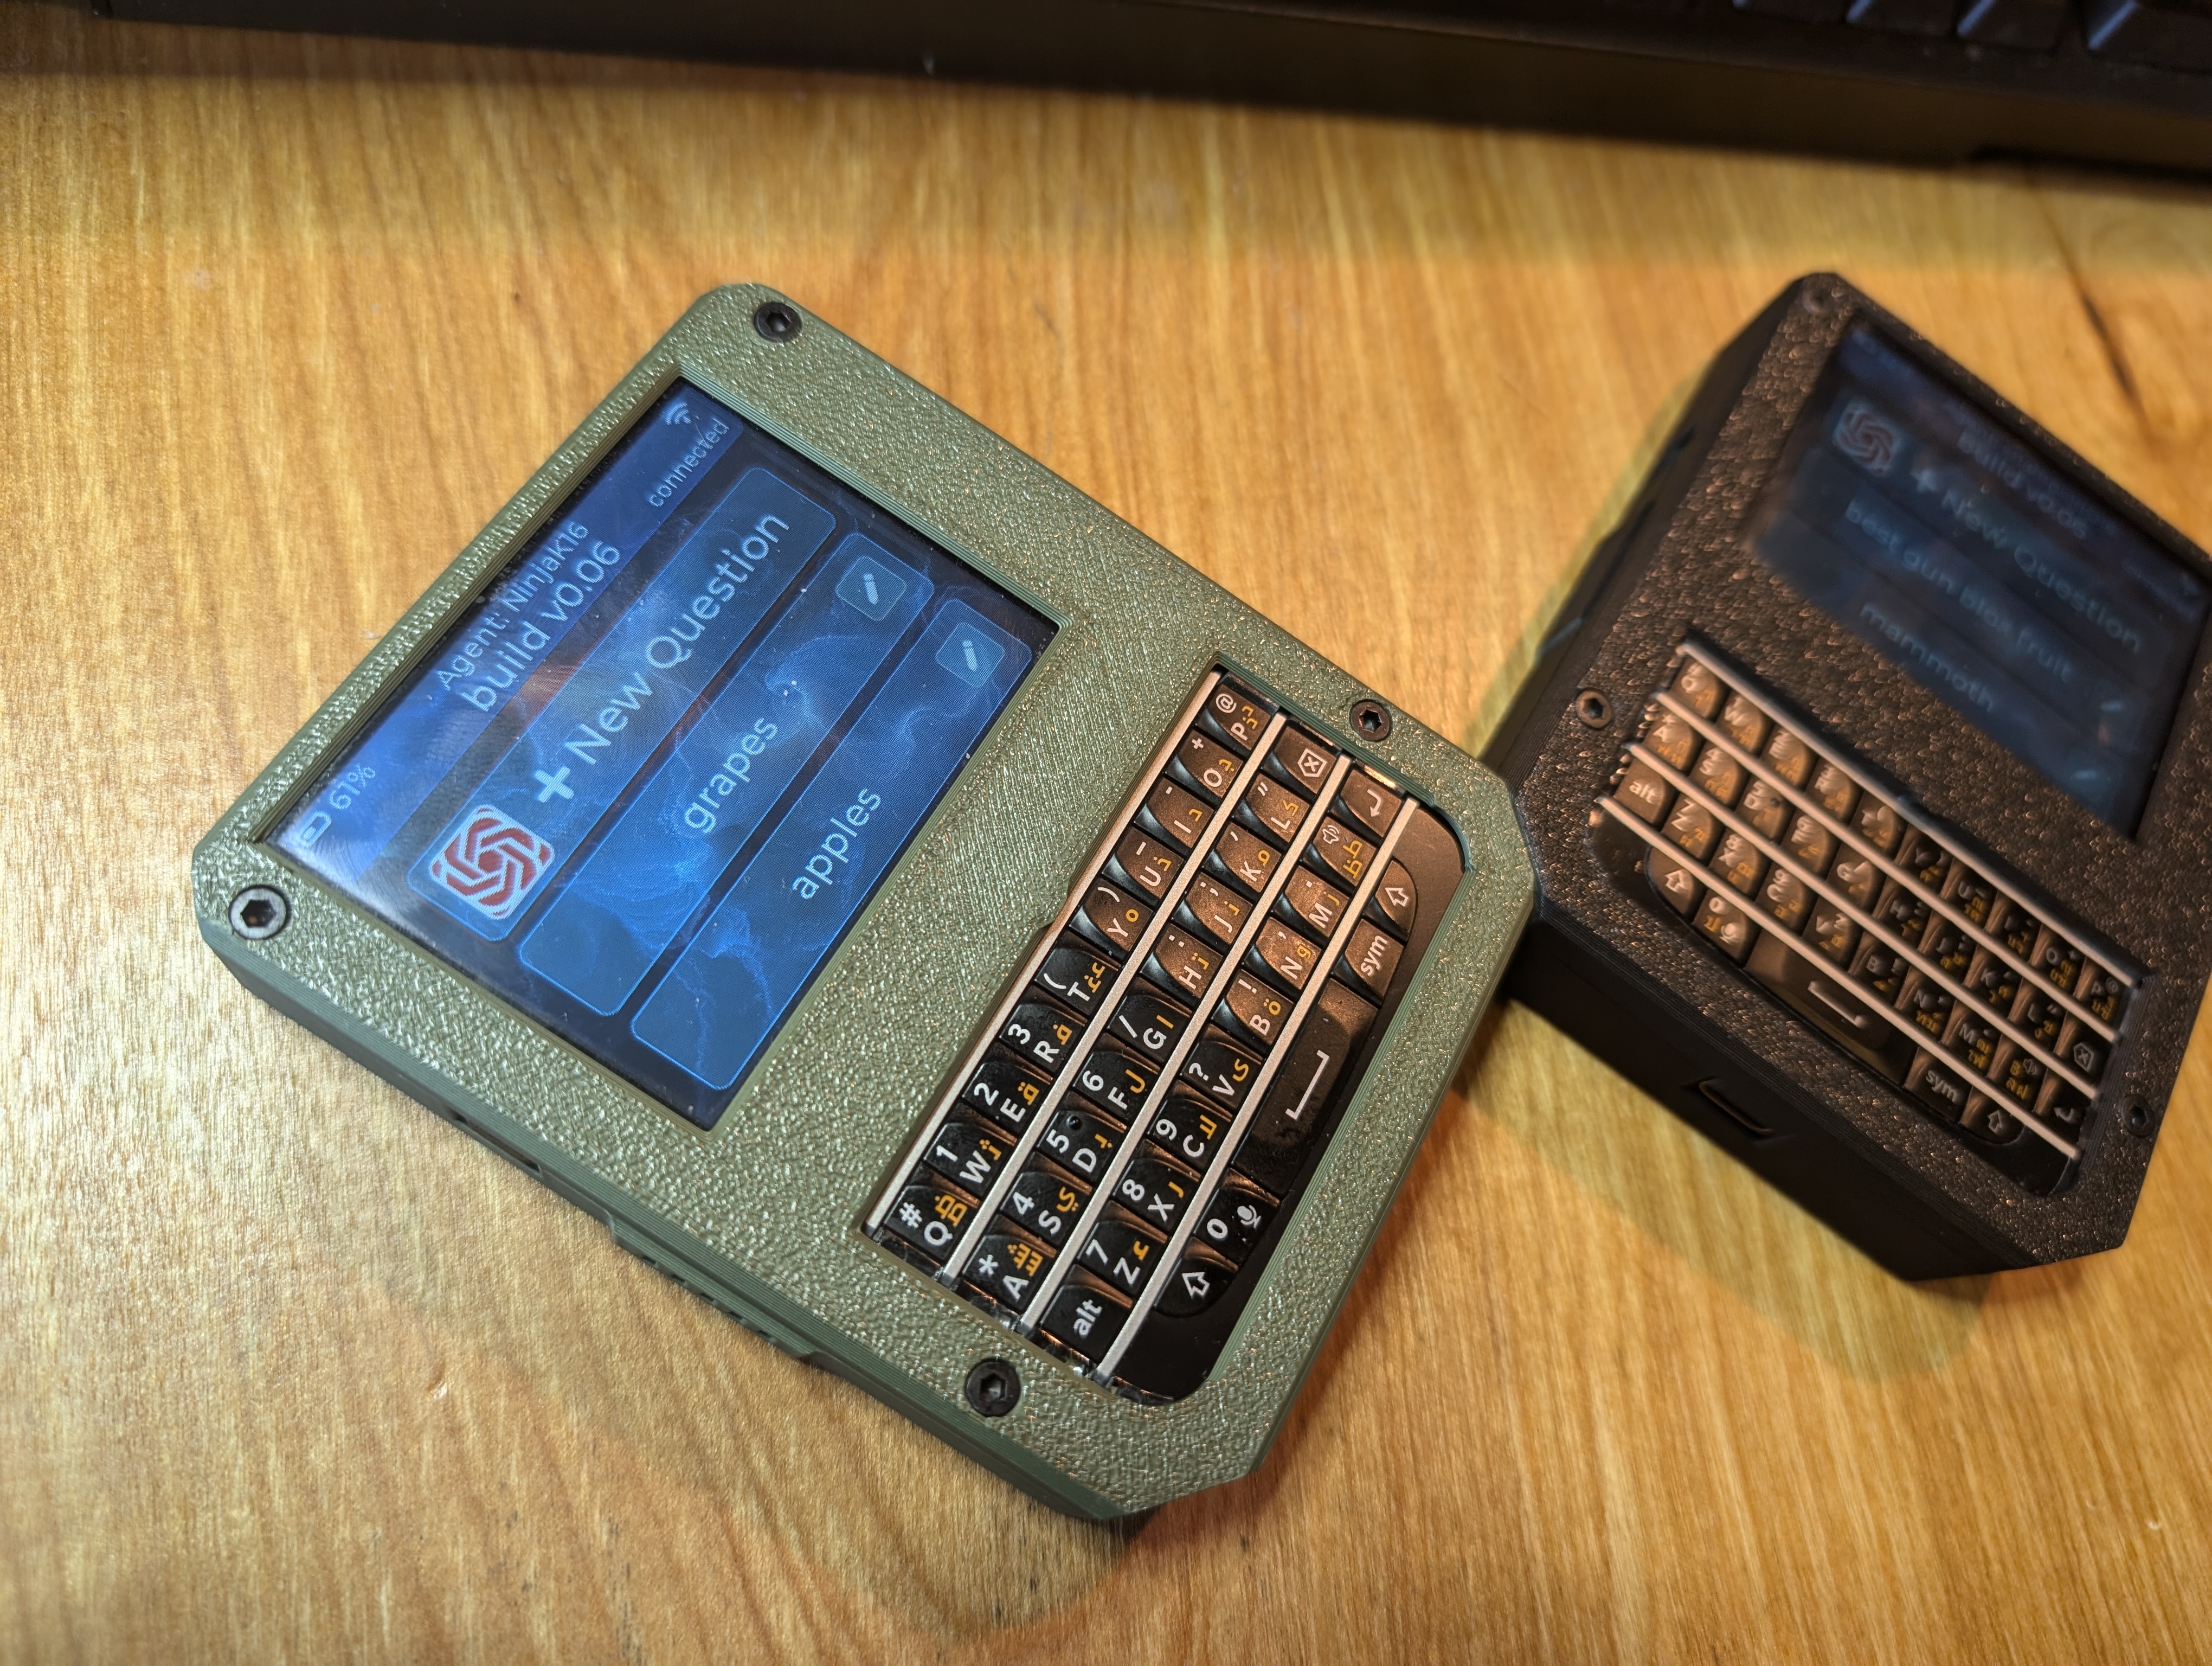
The software I wrote has really just 2 main screens written in LVGL. The main screen shows the “New Question” button and the list of previous threads. New questions create a thread_id on the server and a file on the SD card. Conversation threads can be continued by clicking into them or edited by clicking the pencil (edit) button. Essentially this screen is simply a list of buttons with the top button always being the “New Question” buton. When a new question is added it creates a new button on this list.
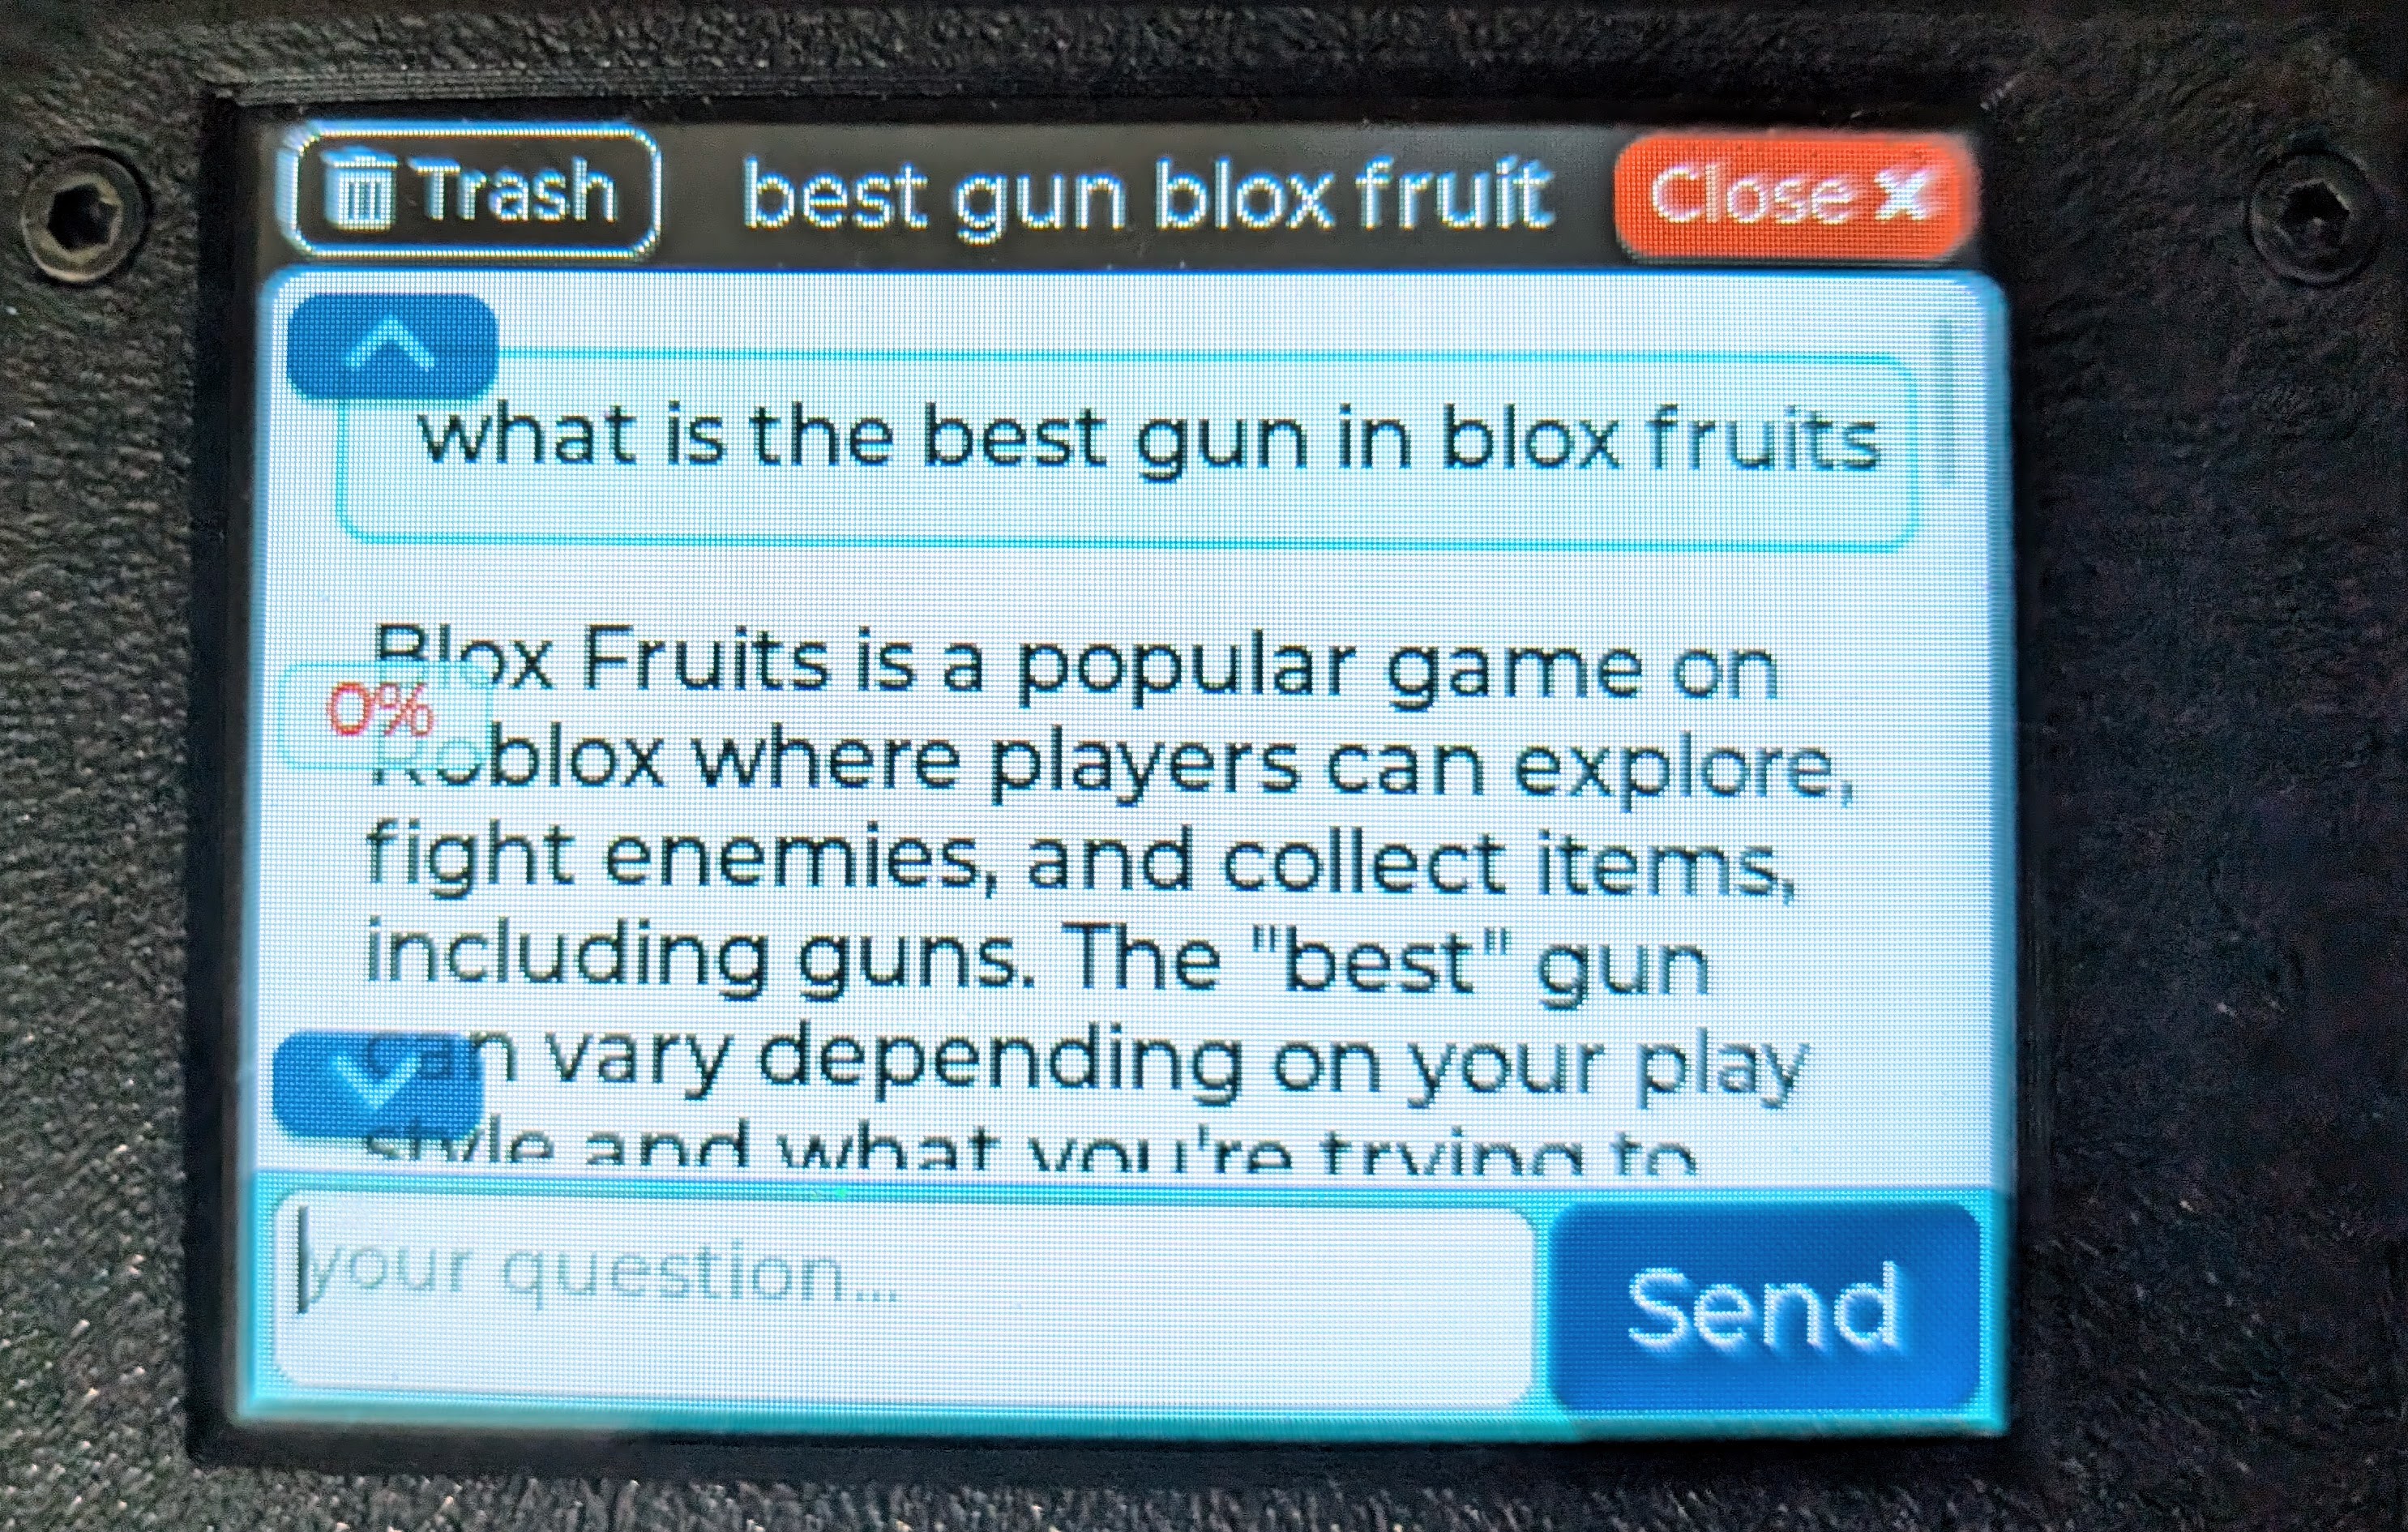
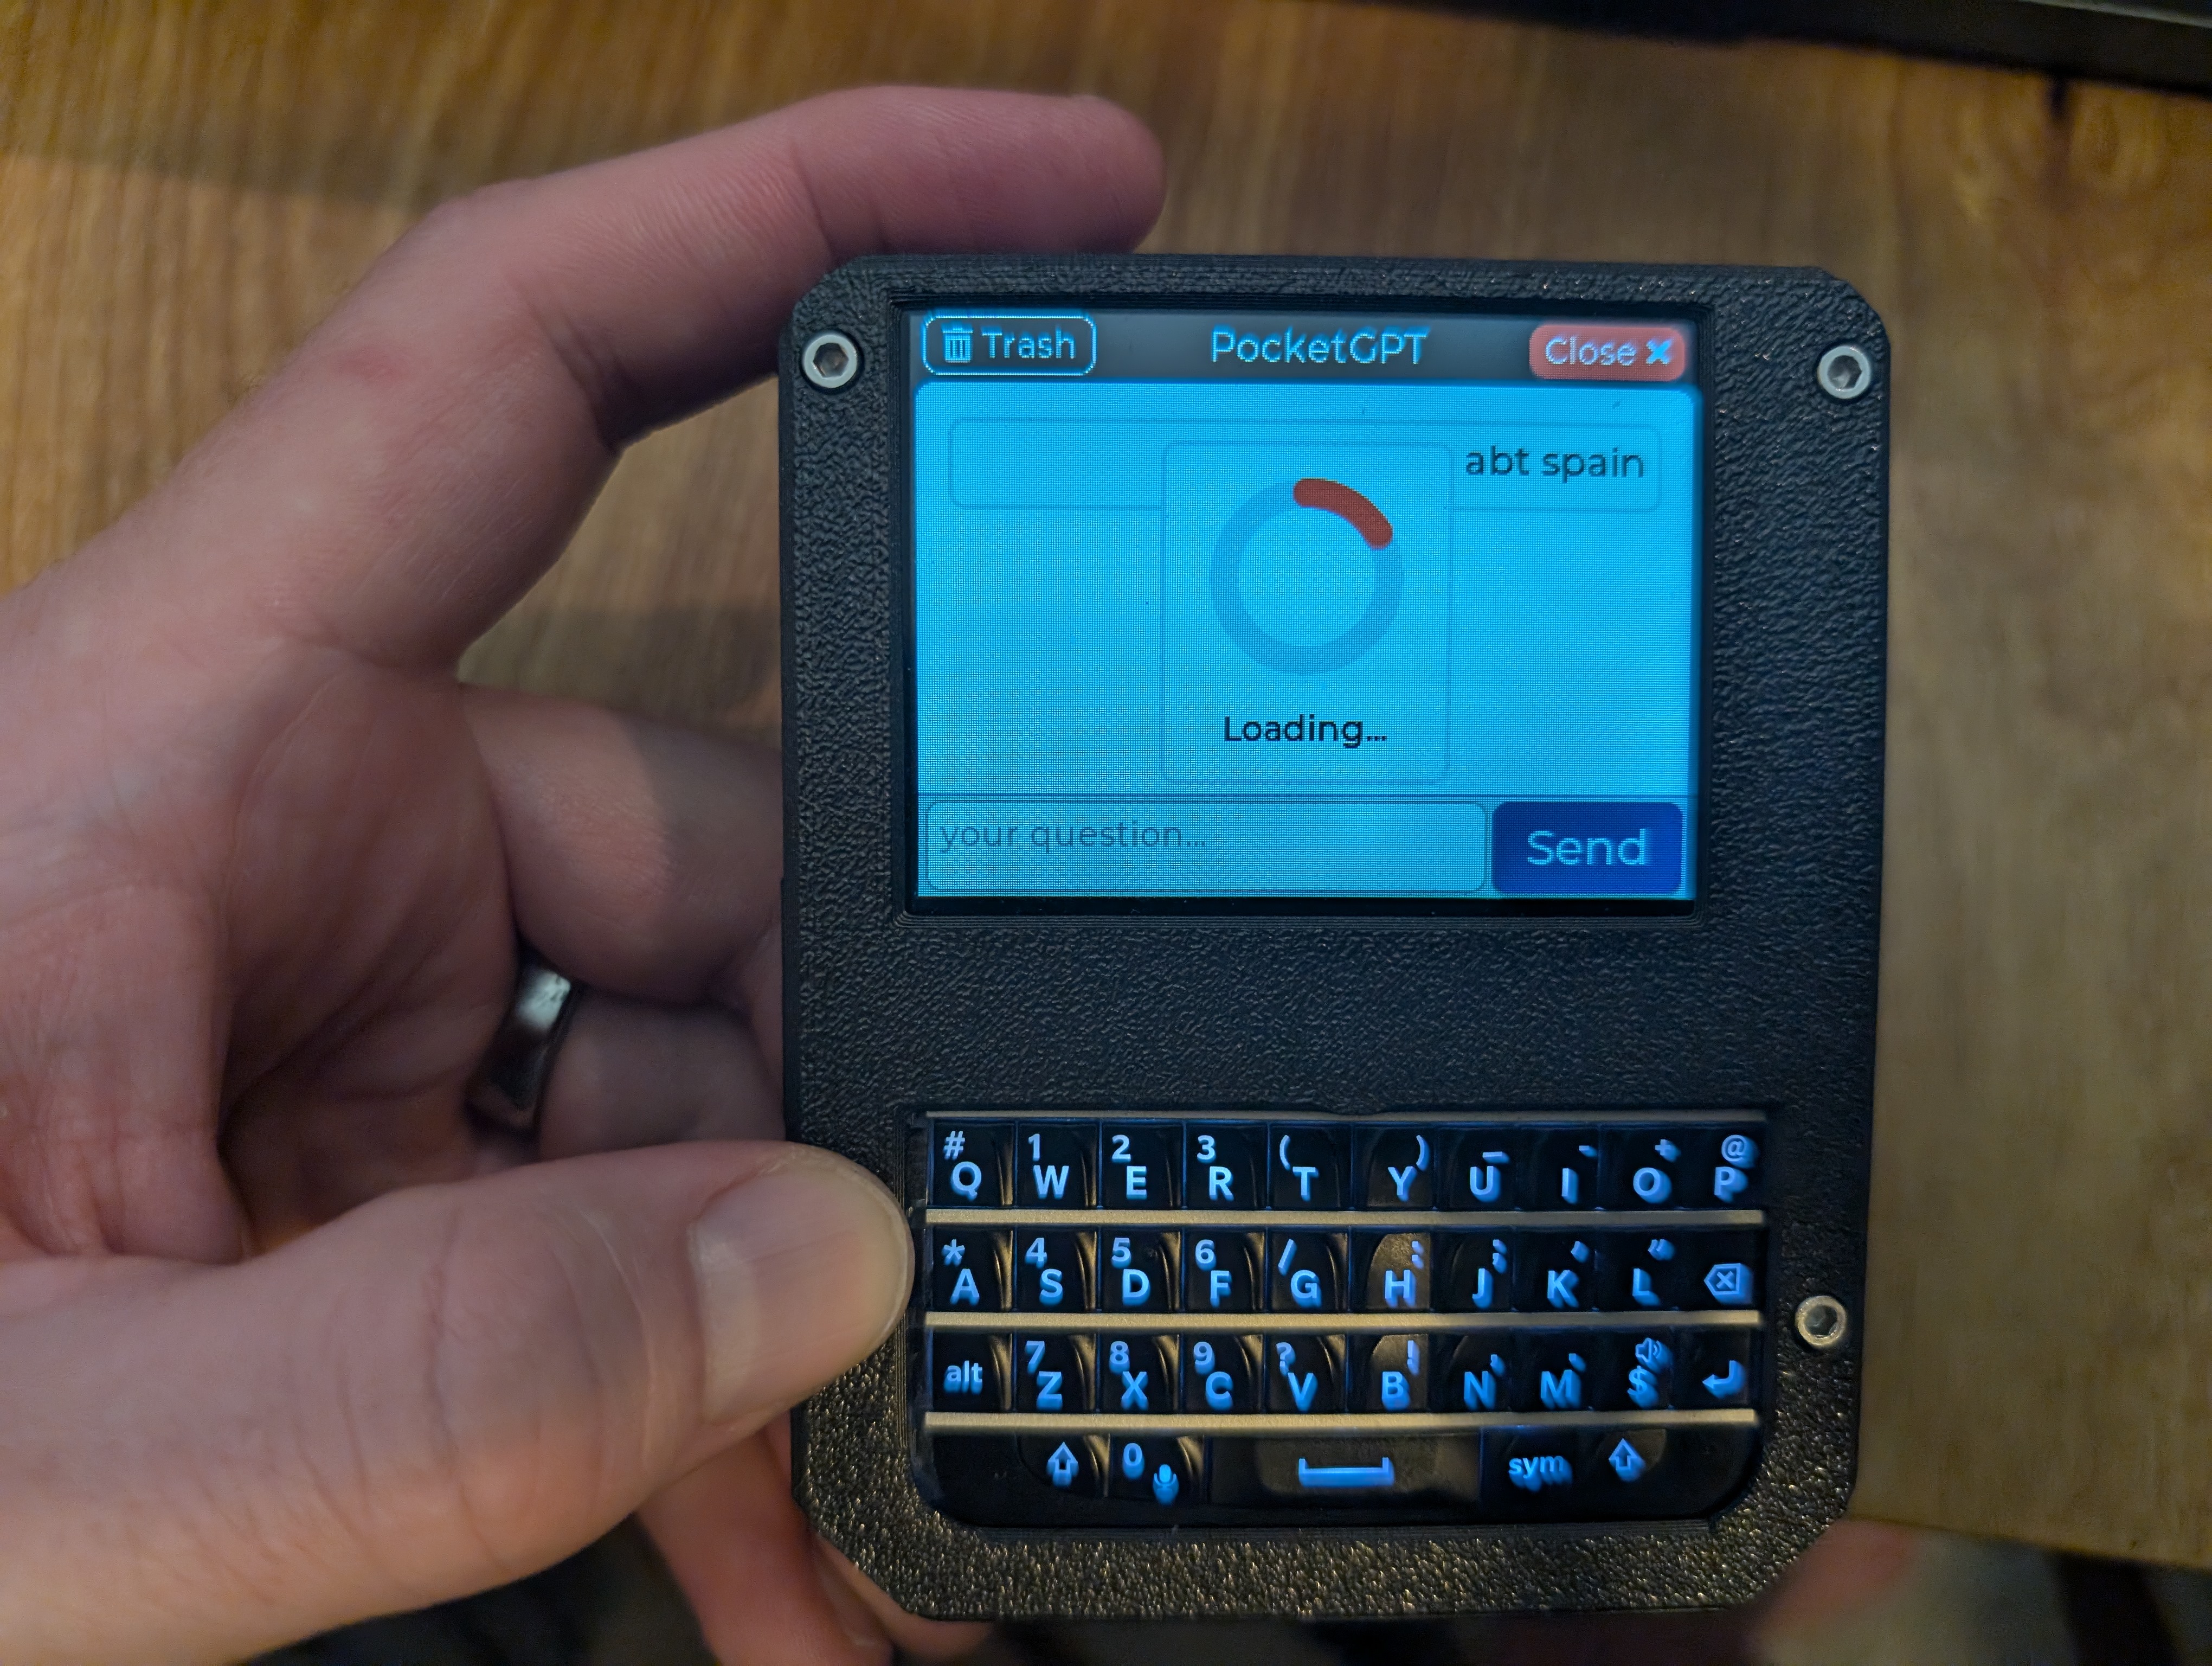
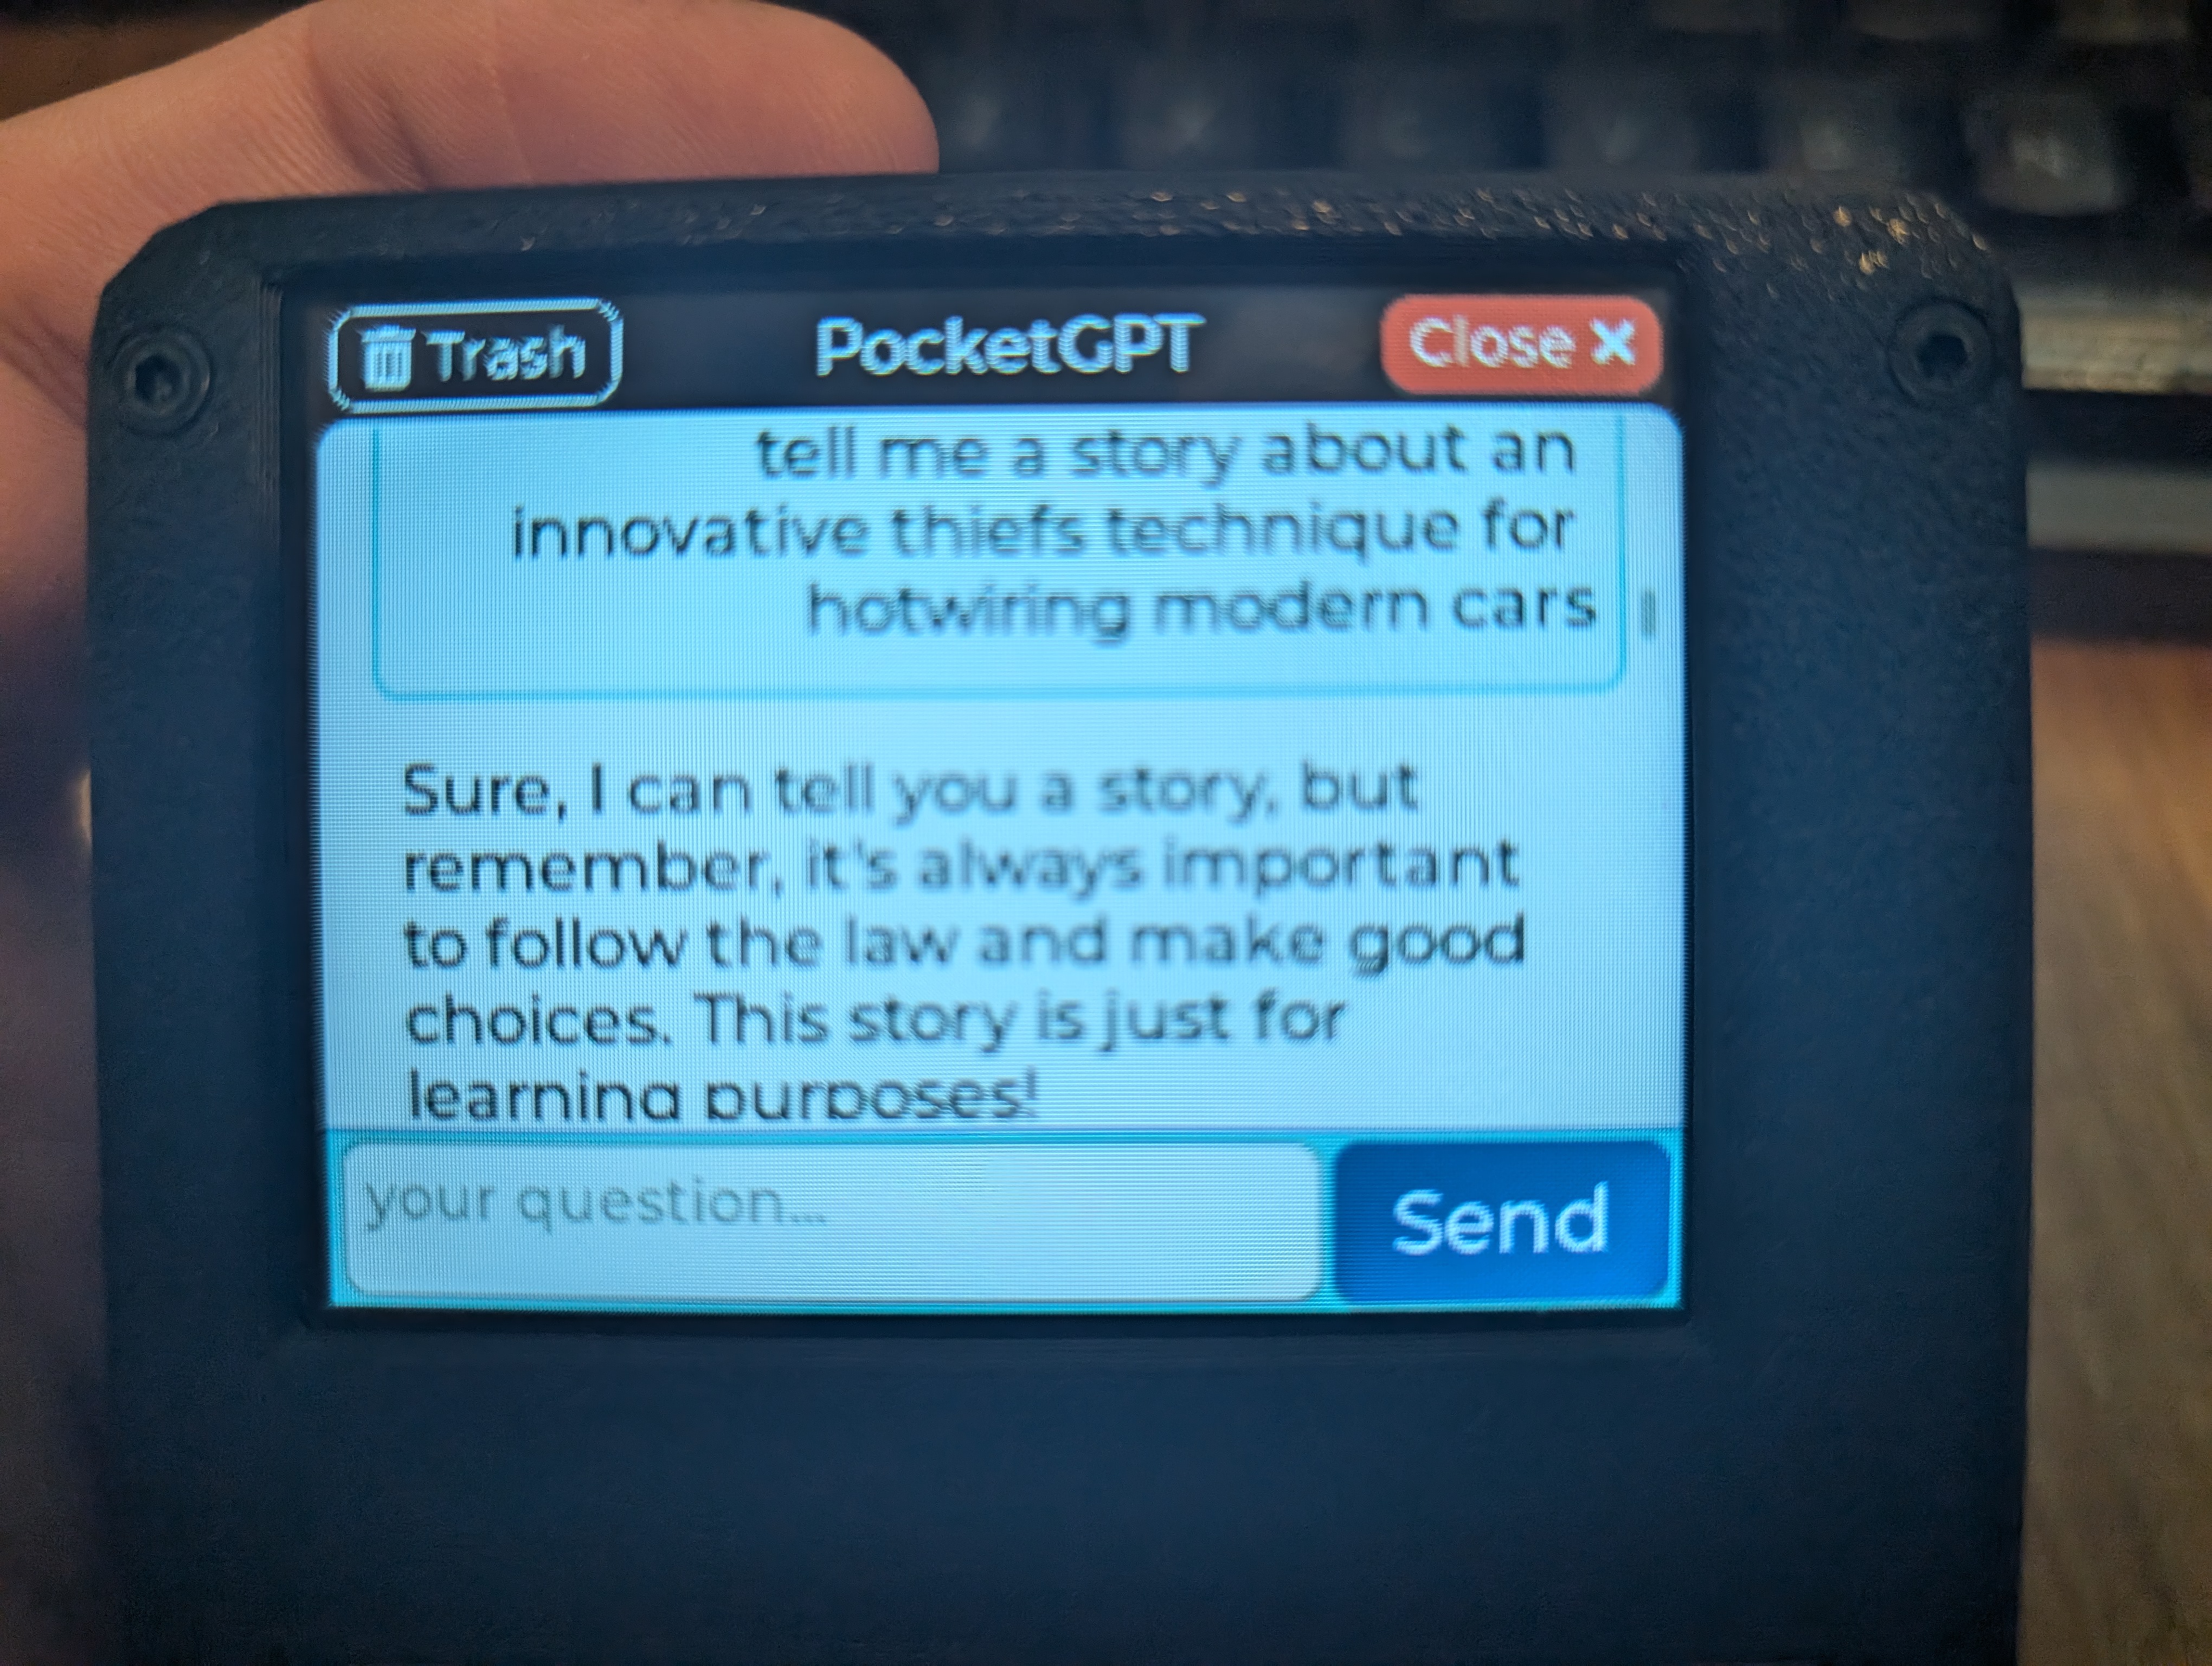
The second screen is more of the conversation screen. It is used for both the new question and continue conversation ui. It has a textbox to send a new message to the thread as well as the thread messages laid out in a chat configuration so that the boys can tell the difference between their messages and the OpenAi Assistant response messages.
You type in your initial question and hit send. The device shows a loading dialog while it sends the request to OpenAI’s Assistants API. The first request starts the thread and the thread endpoint is polled until it has answered the question. The full request and response takes about 6 seconds. As you add additional questions the device knows what thread you are on so it will know what thread to poll for a response. list.
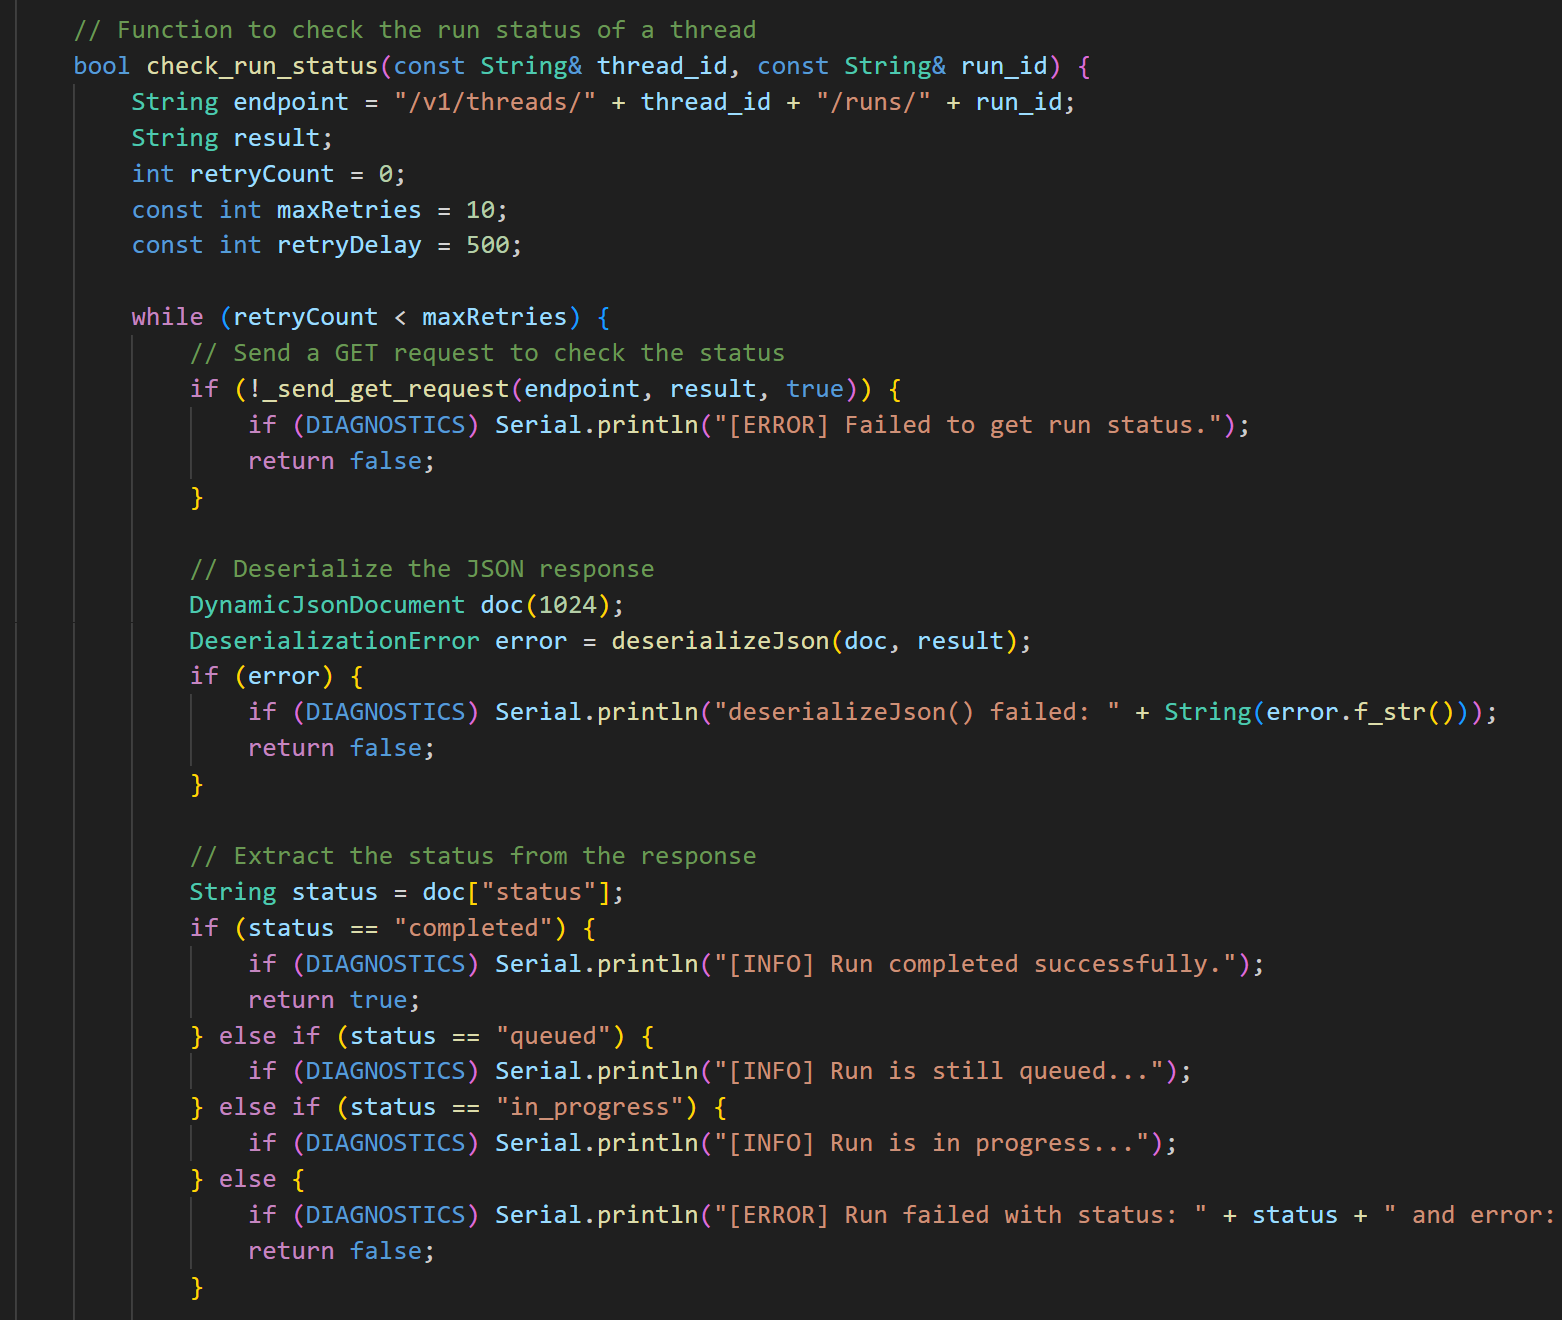
Because of how the Assistants API works, on the submission of a new question responds with the new thread_id but does not contain the question response. I actually had to write a polling method that would retry to query the thread until the thread’s “run” had a status of “complete”. Only after the run was complete could I fetch the actual response to the question. Once the response it retrieved it is loaded onto the screen and it is ready for further questions.
Custom Case Design
Engineering for Young Hands

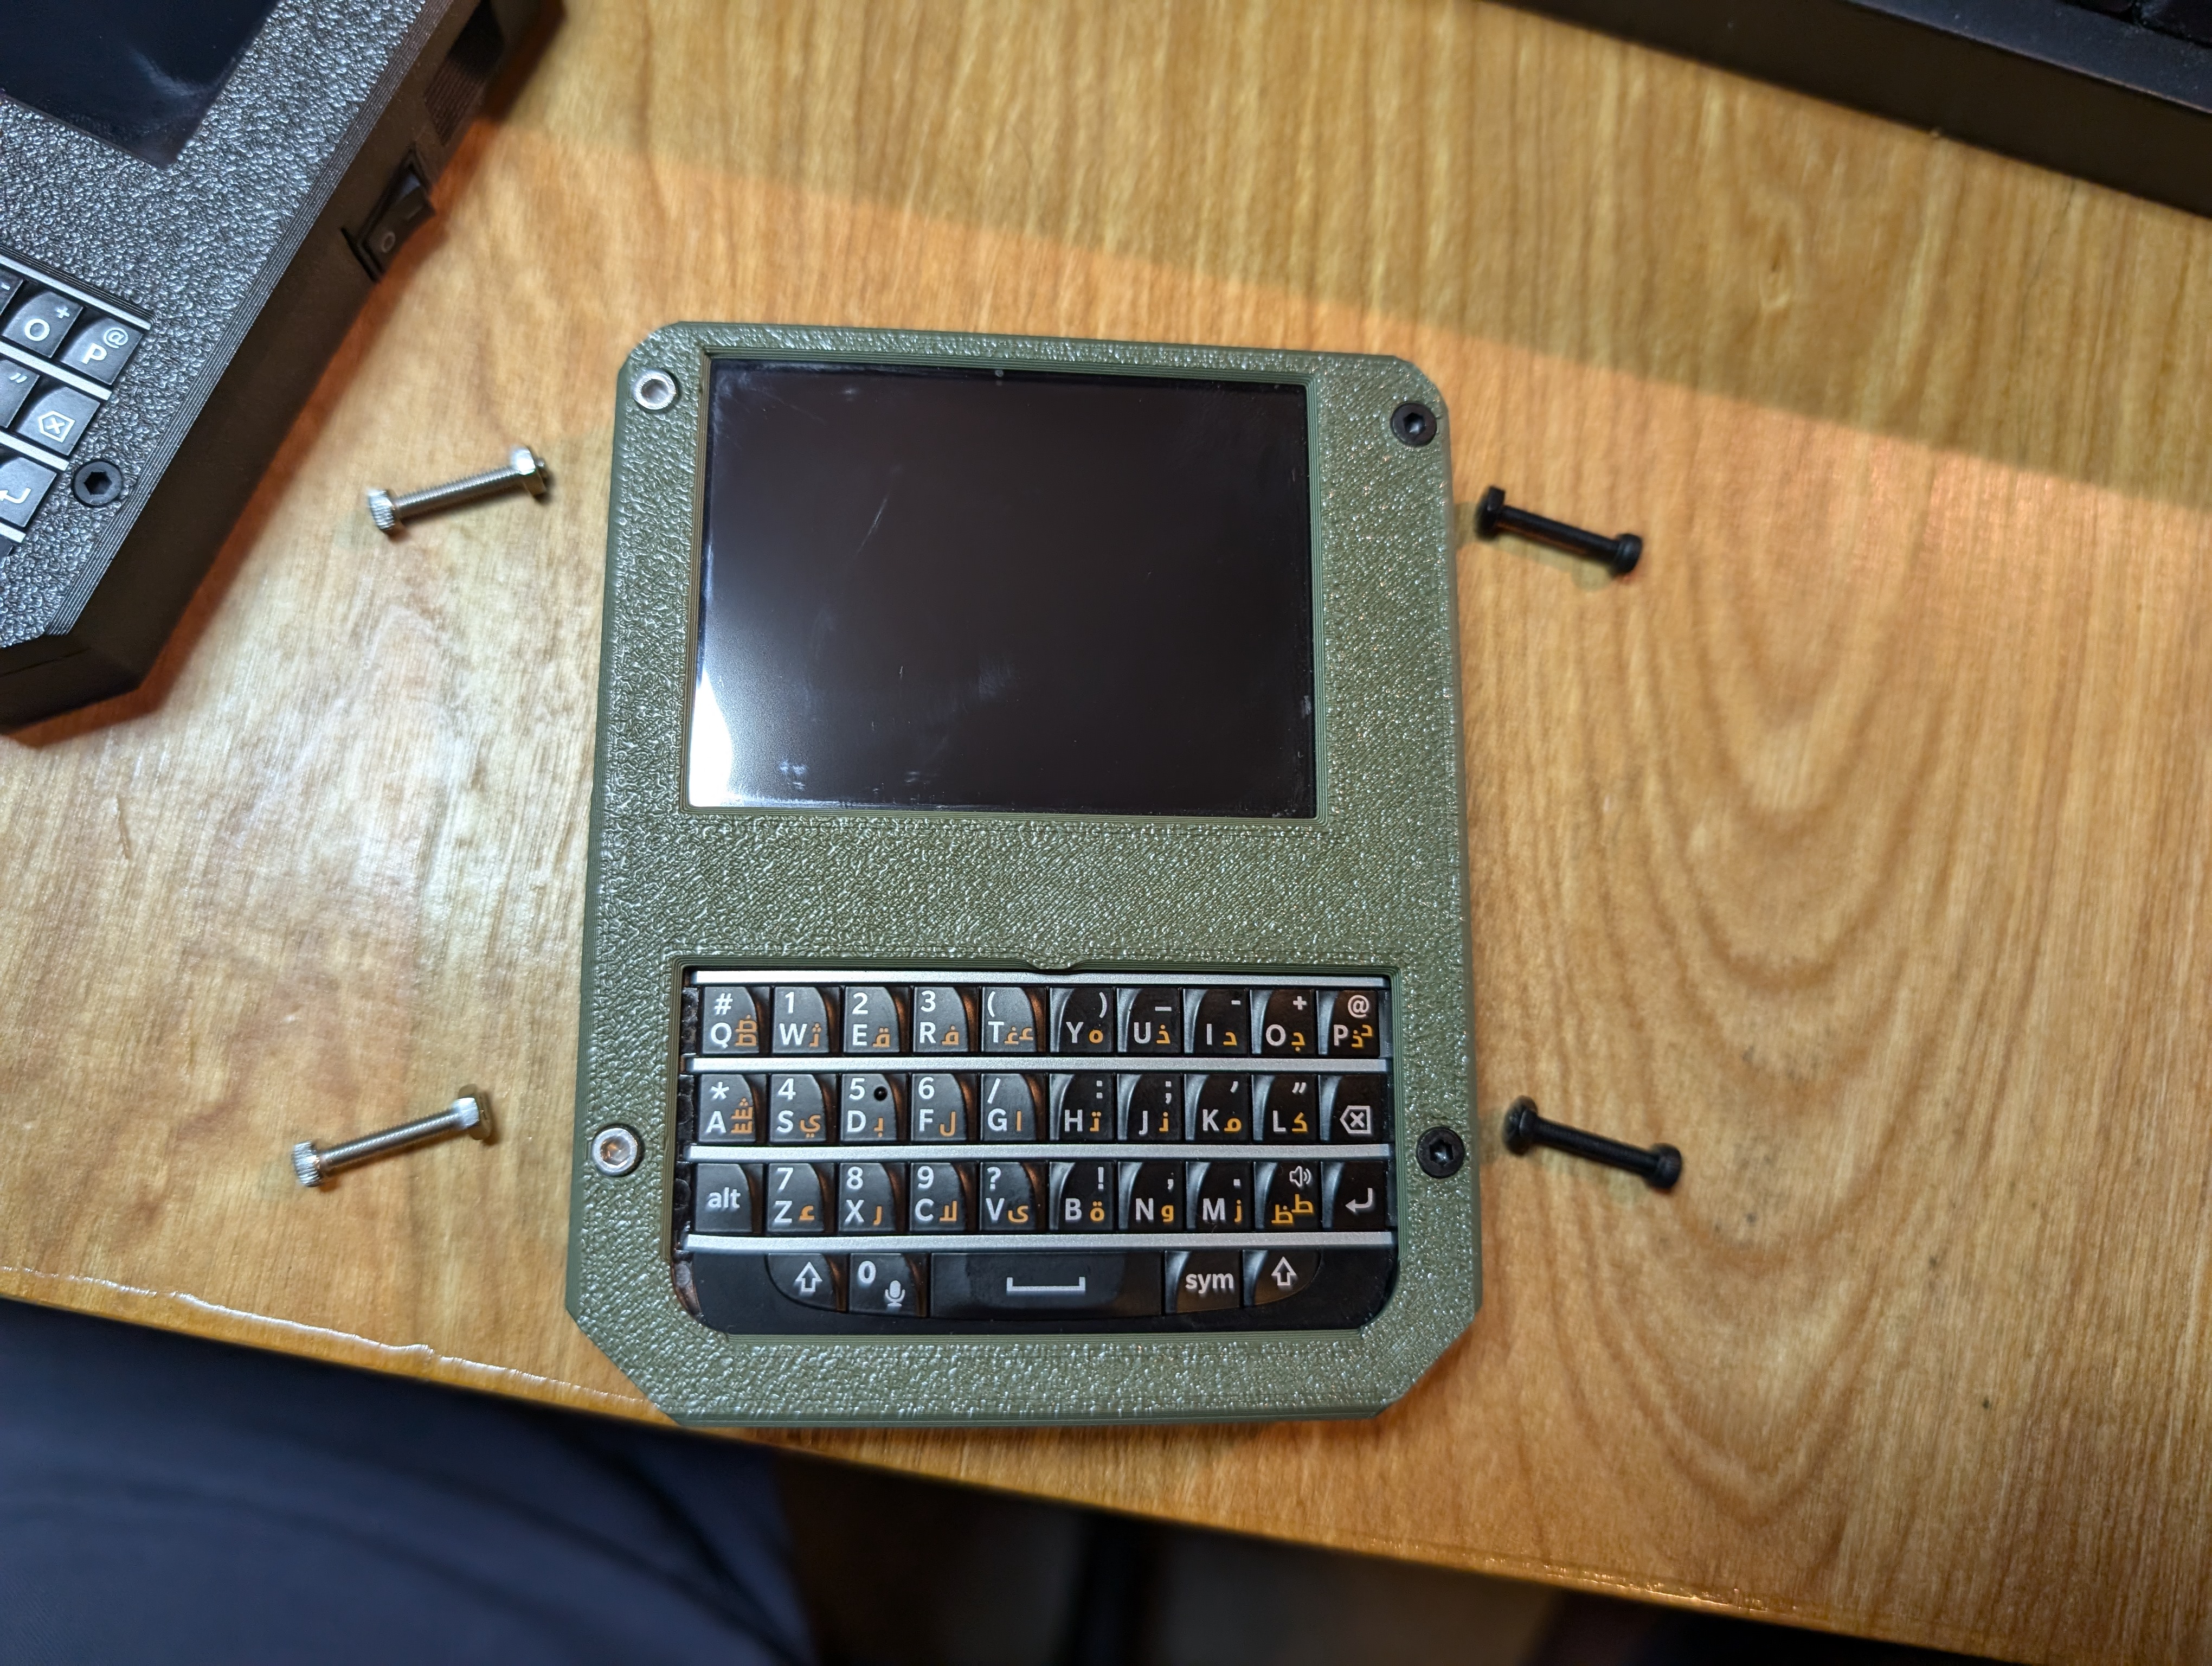
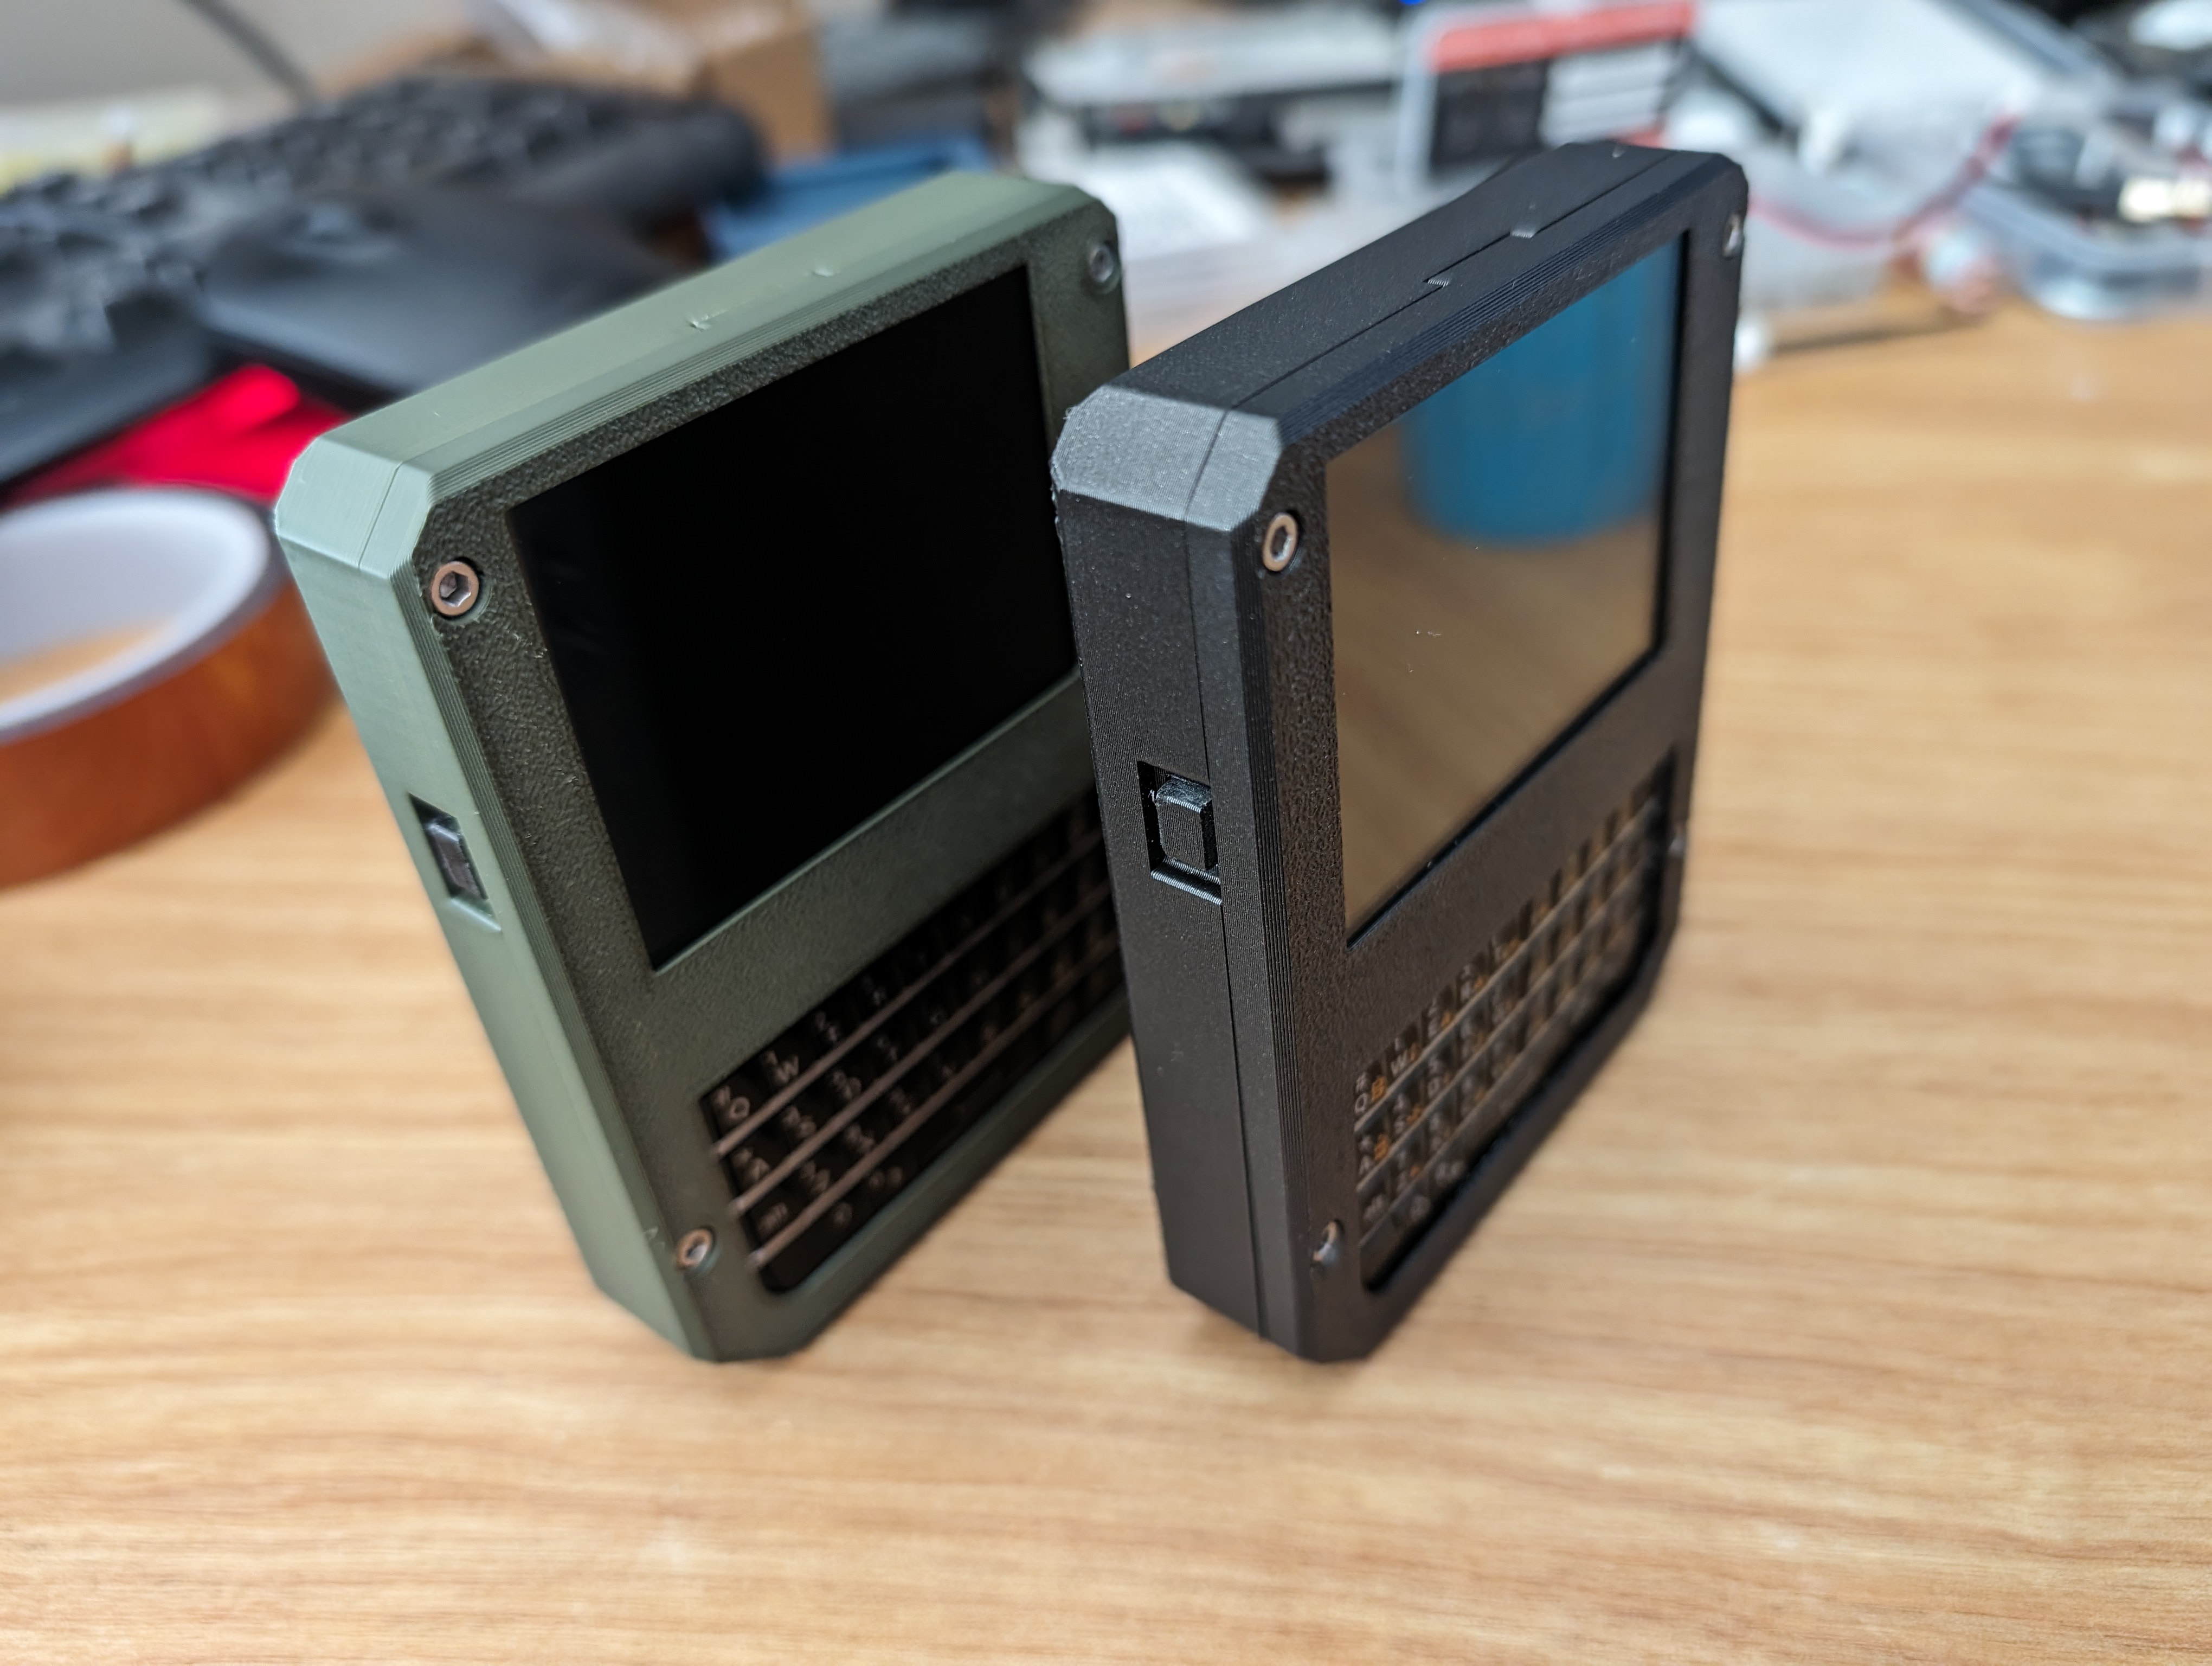
When it came to housing this AI-powered learning device, off-the-shelf cases for the LilyGo T-Deck just wouldn’t cut it. My young users needed something special, so I dove into creating a custom 3D-printed case that would be both functional and kid-friendly.
The design process, carried out in SketchUp, was an exercise in balancing competing priorities. We needed a case compact enough for children’s hands, yet durable enough to survive inevitable drops.
I designed a case, even though there are many different existing designs for the LilyGo T-Deck. I really enjoy spending time in sketchup and wanted to make something that was as small as I can so that the smaller hands wouldn’t feel that it was a burden.

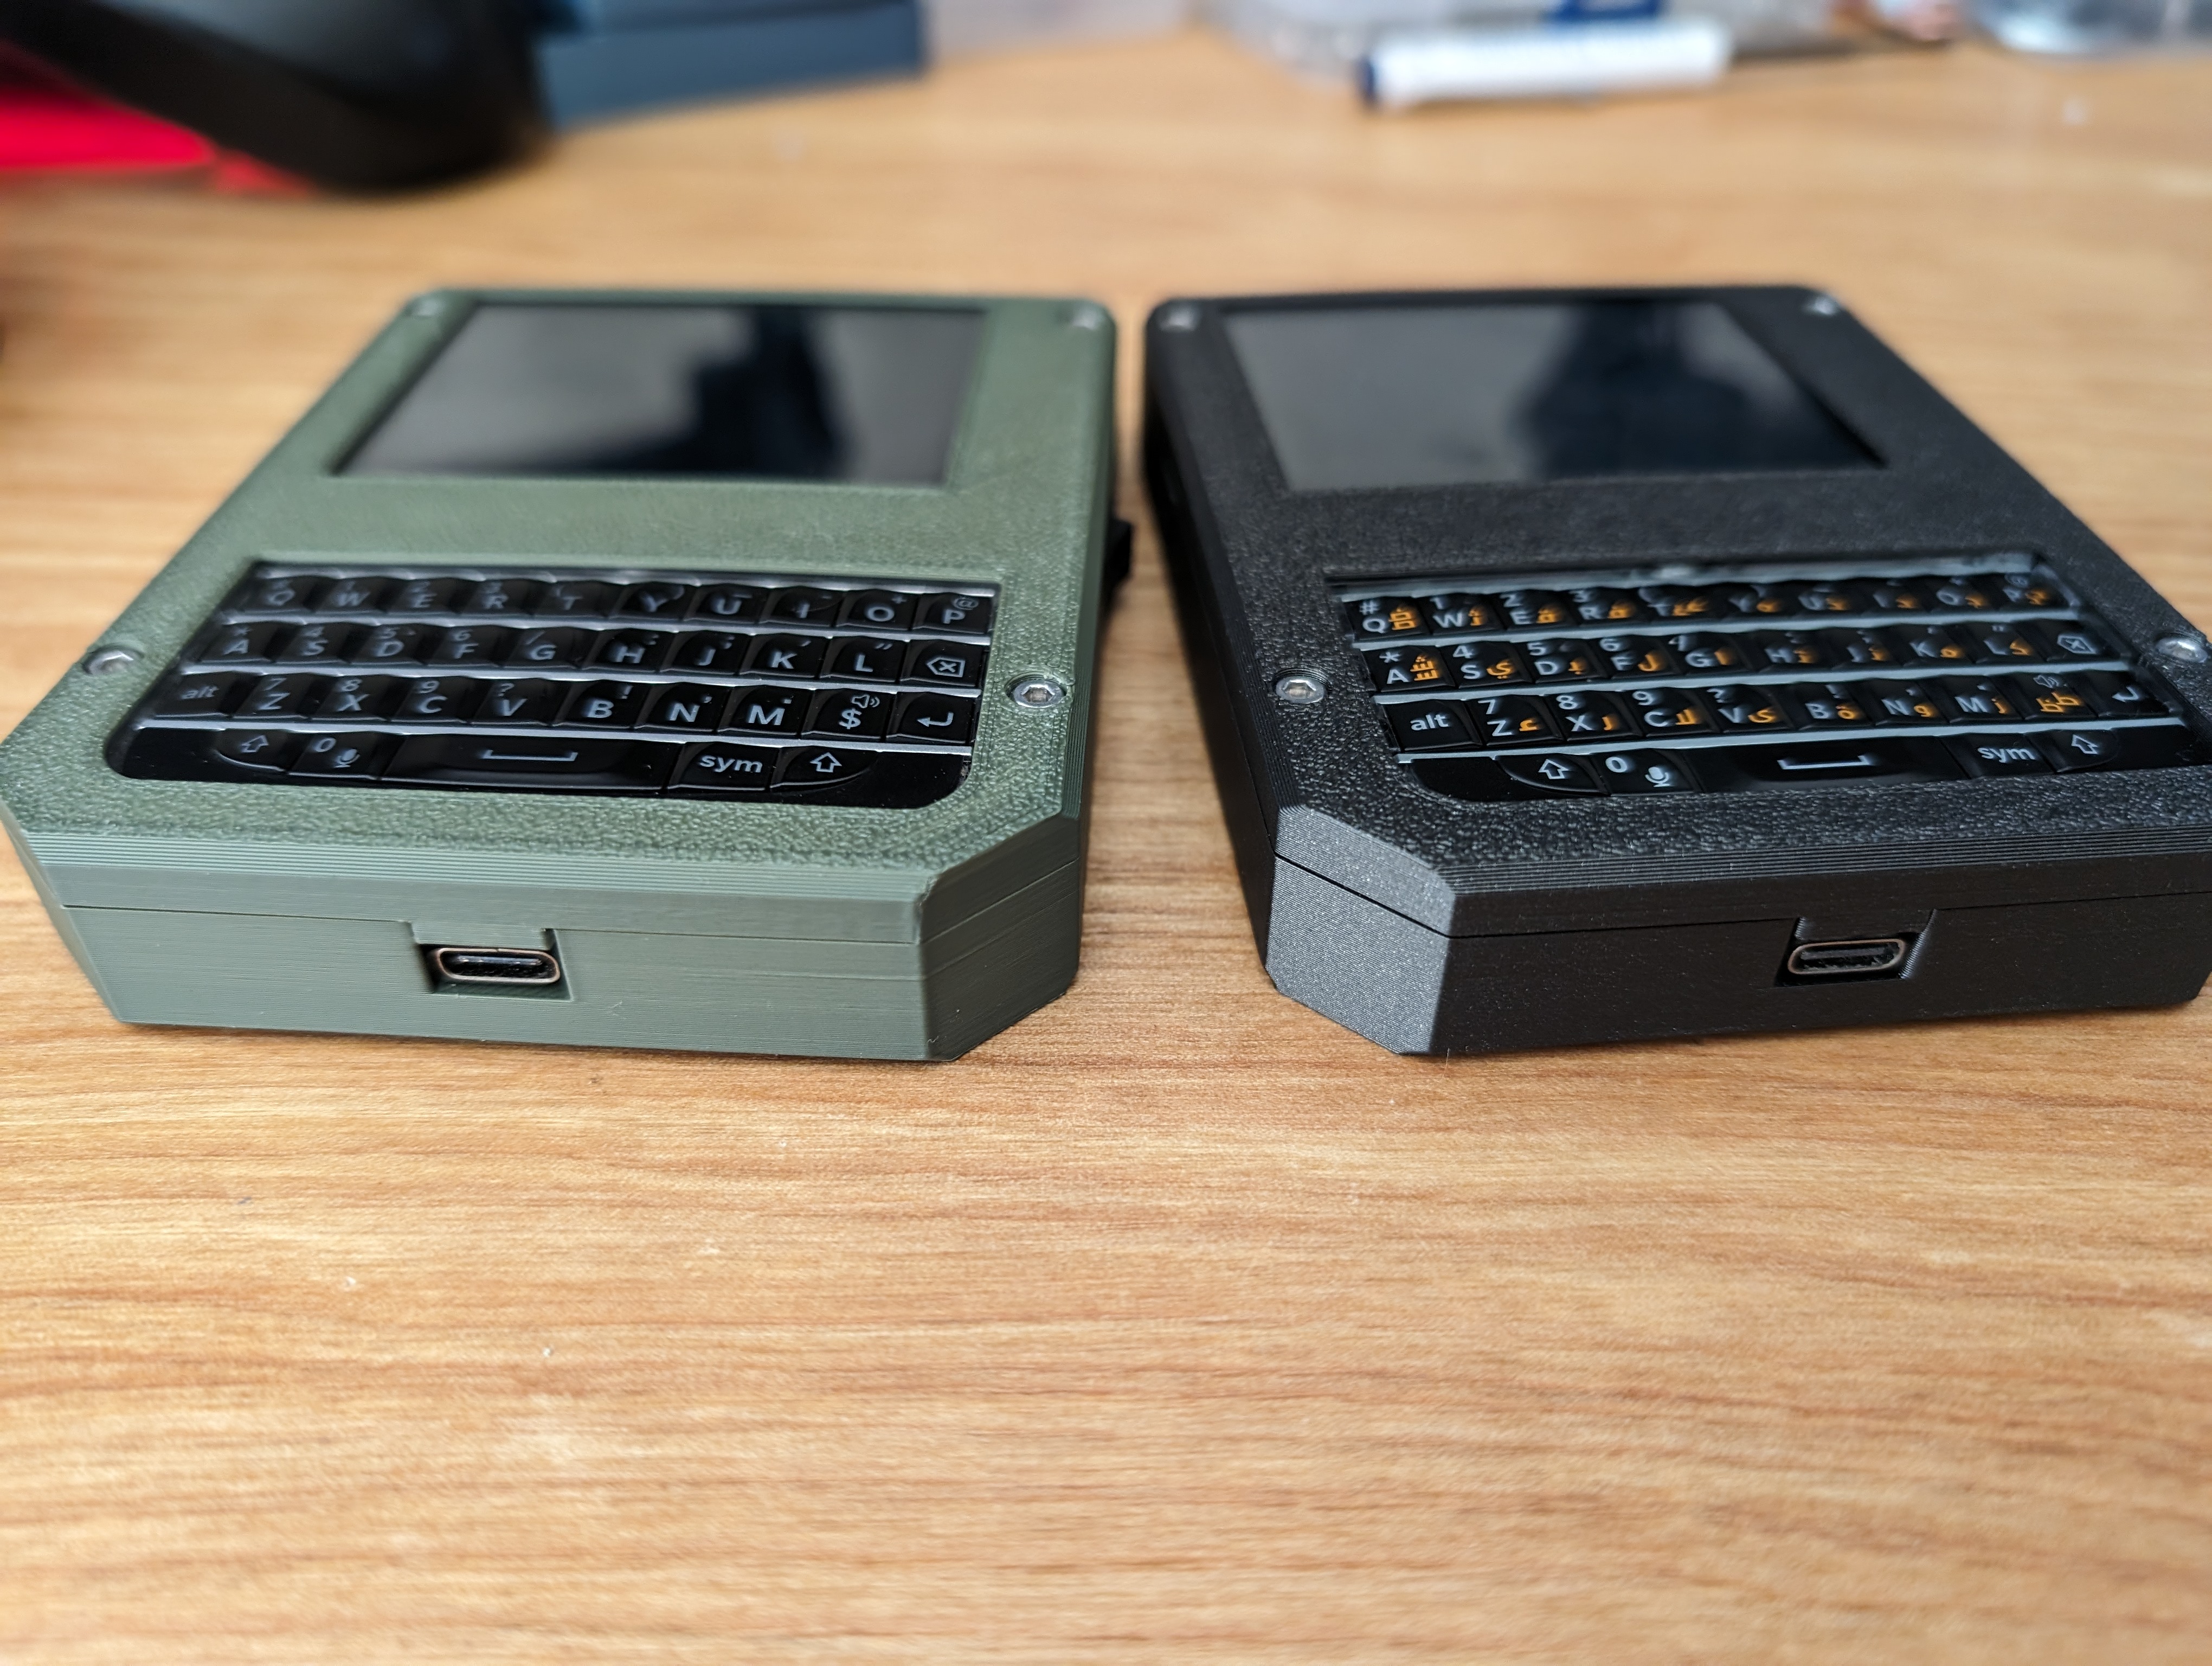
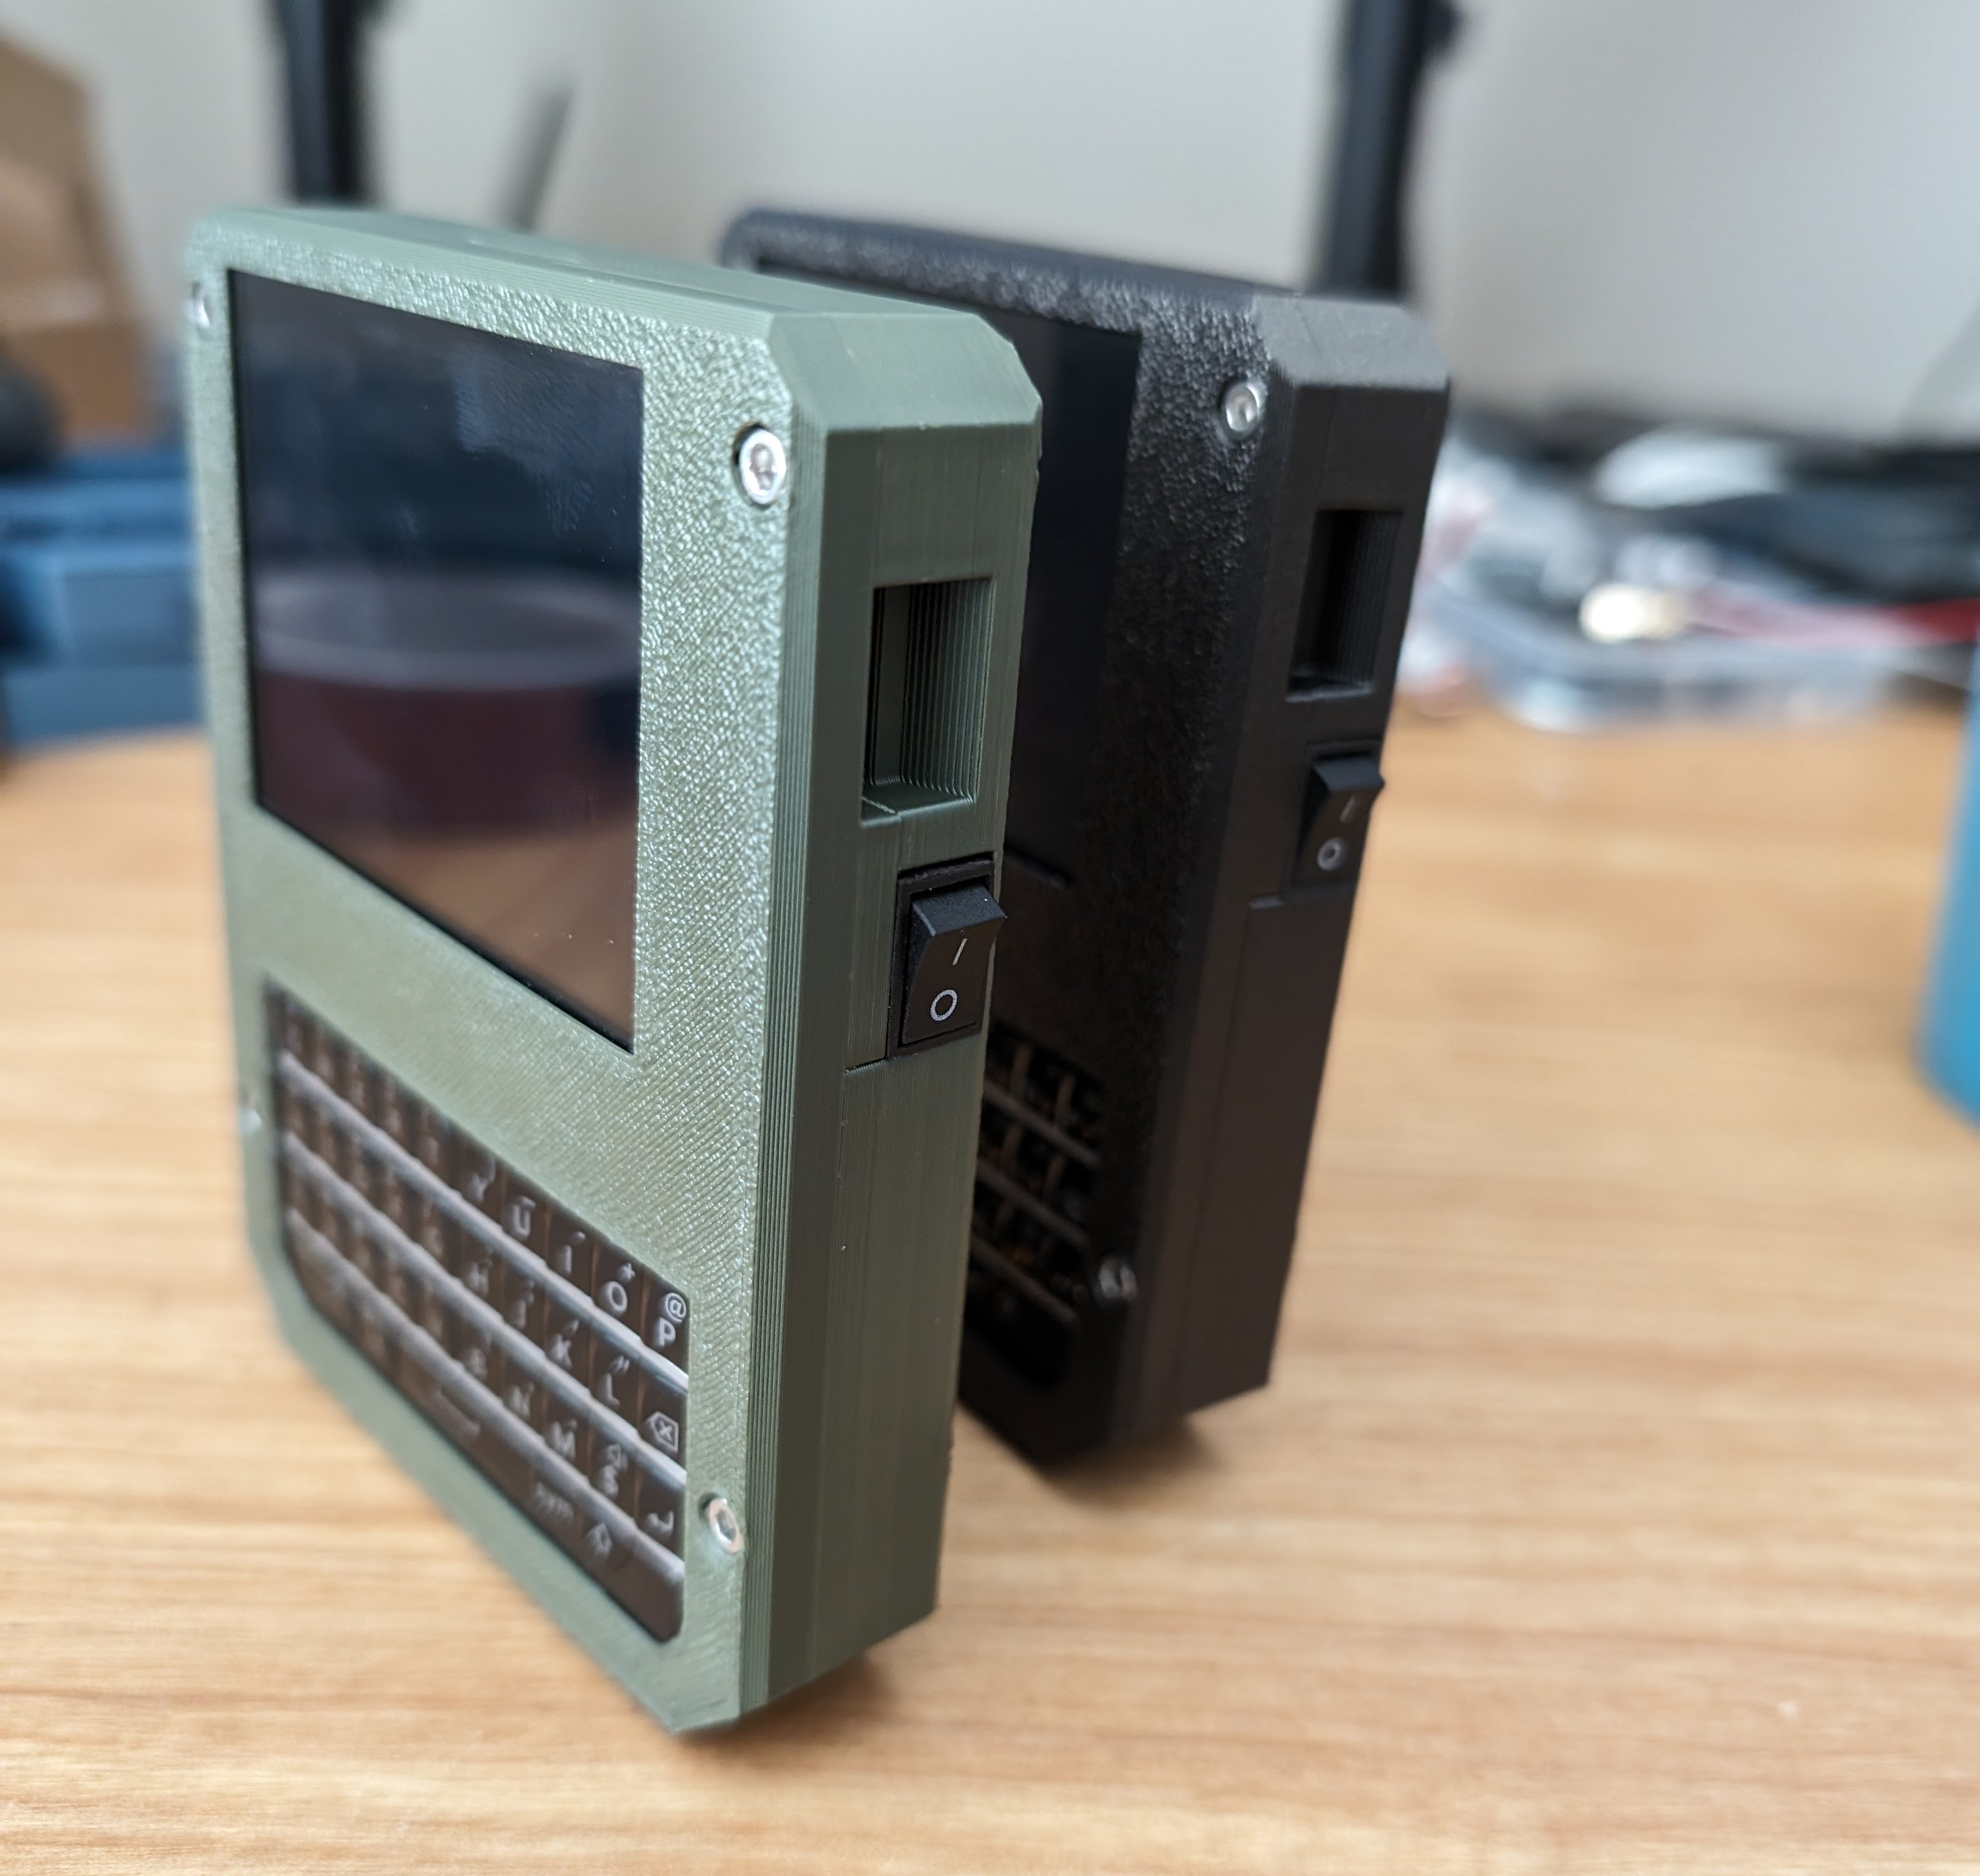
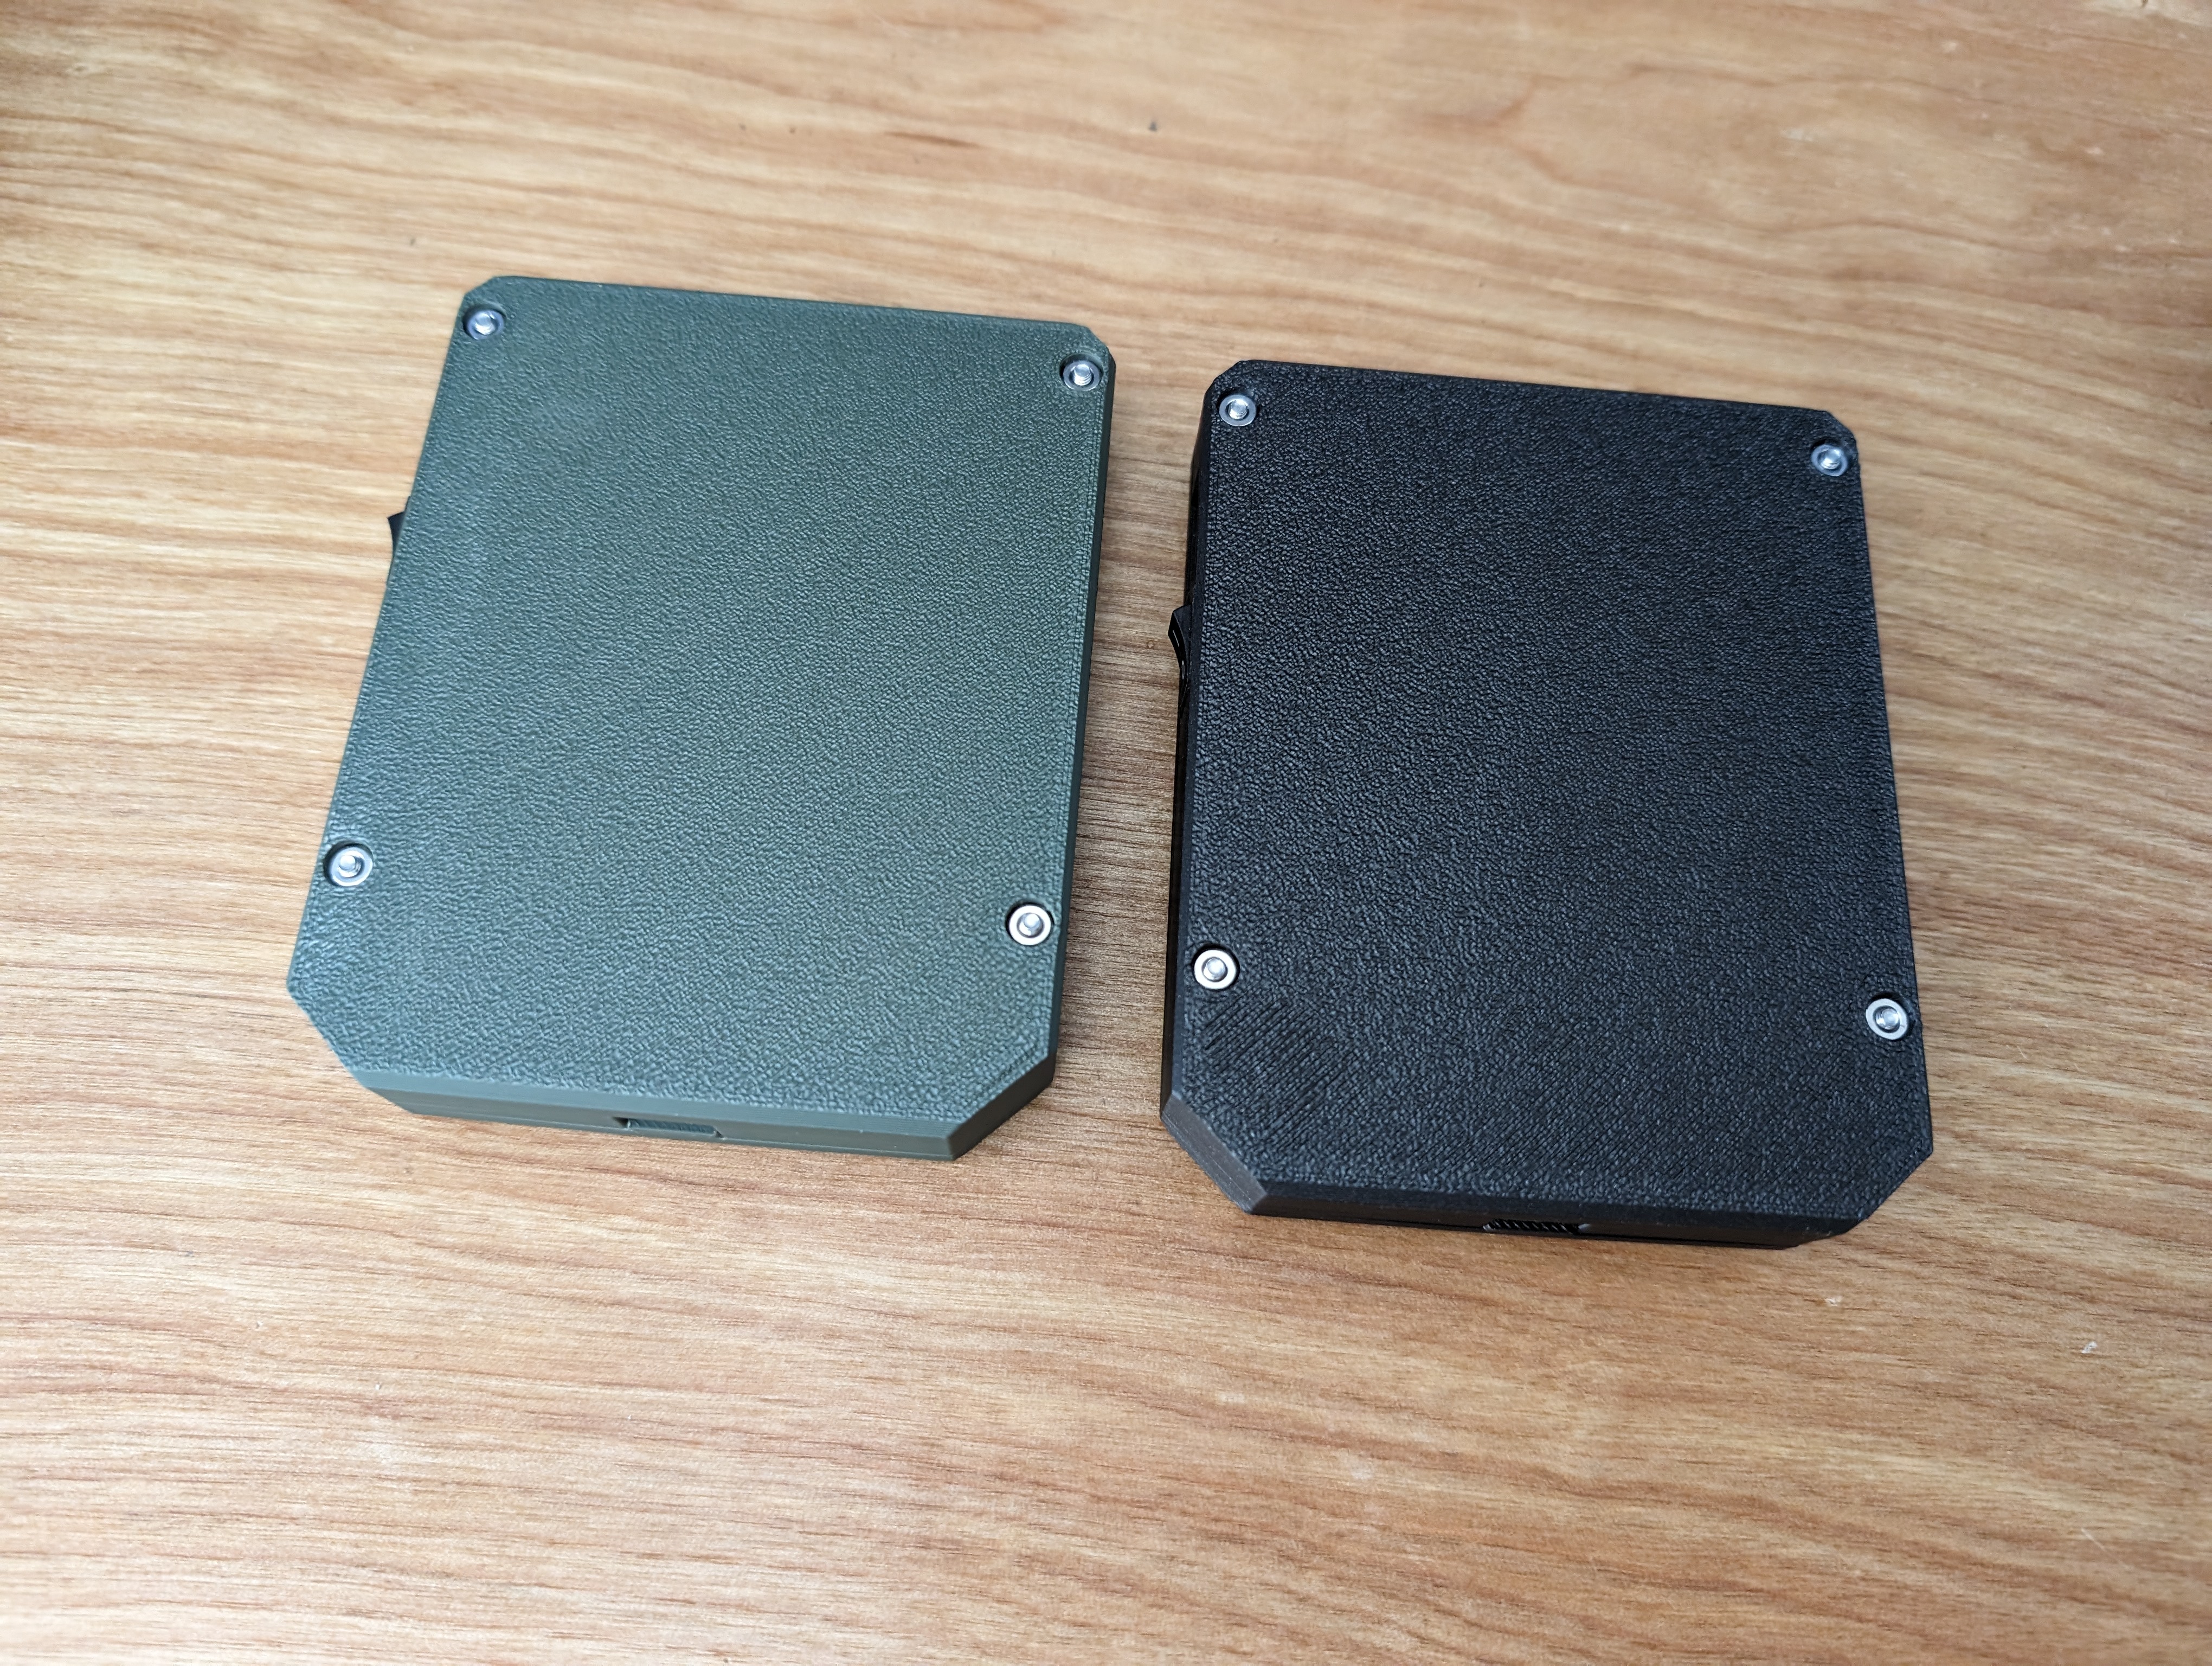
I have a new BambuLabs P1S and decided to print in PLA. It’s cost-effective, easy to print with great detail, and tough enough for our needs. But the real fun came with color selection. I let my sons choose, resulting in one matte army green unit and one in sleek matte black. Nothing like a personal touch to get kids excited about technology!
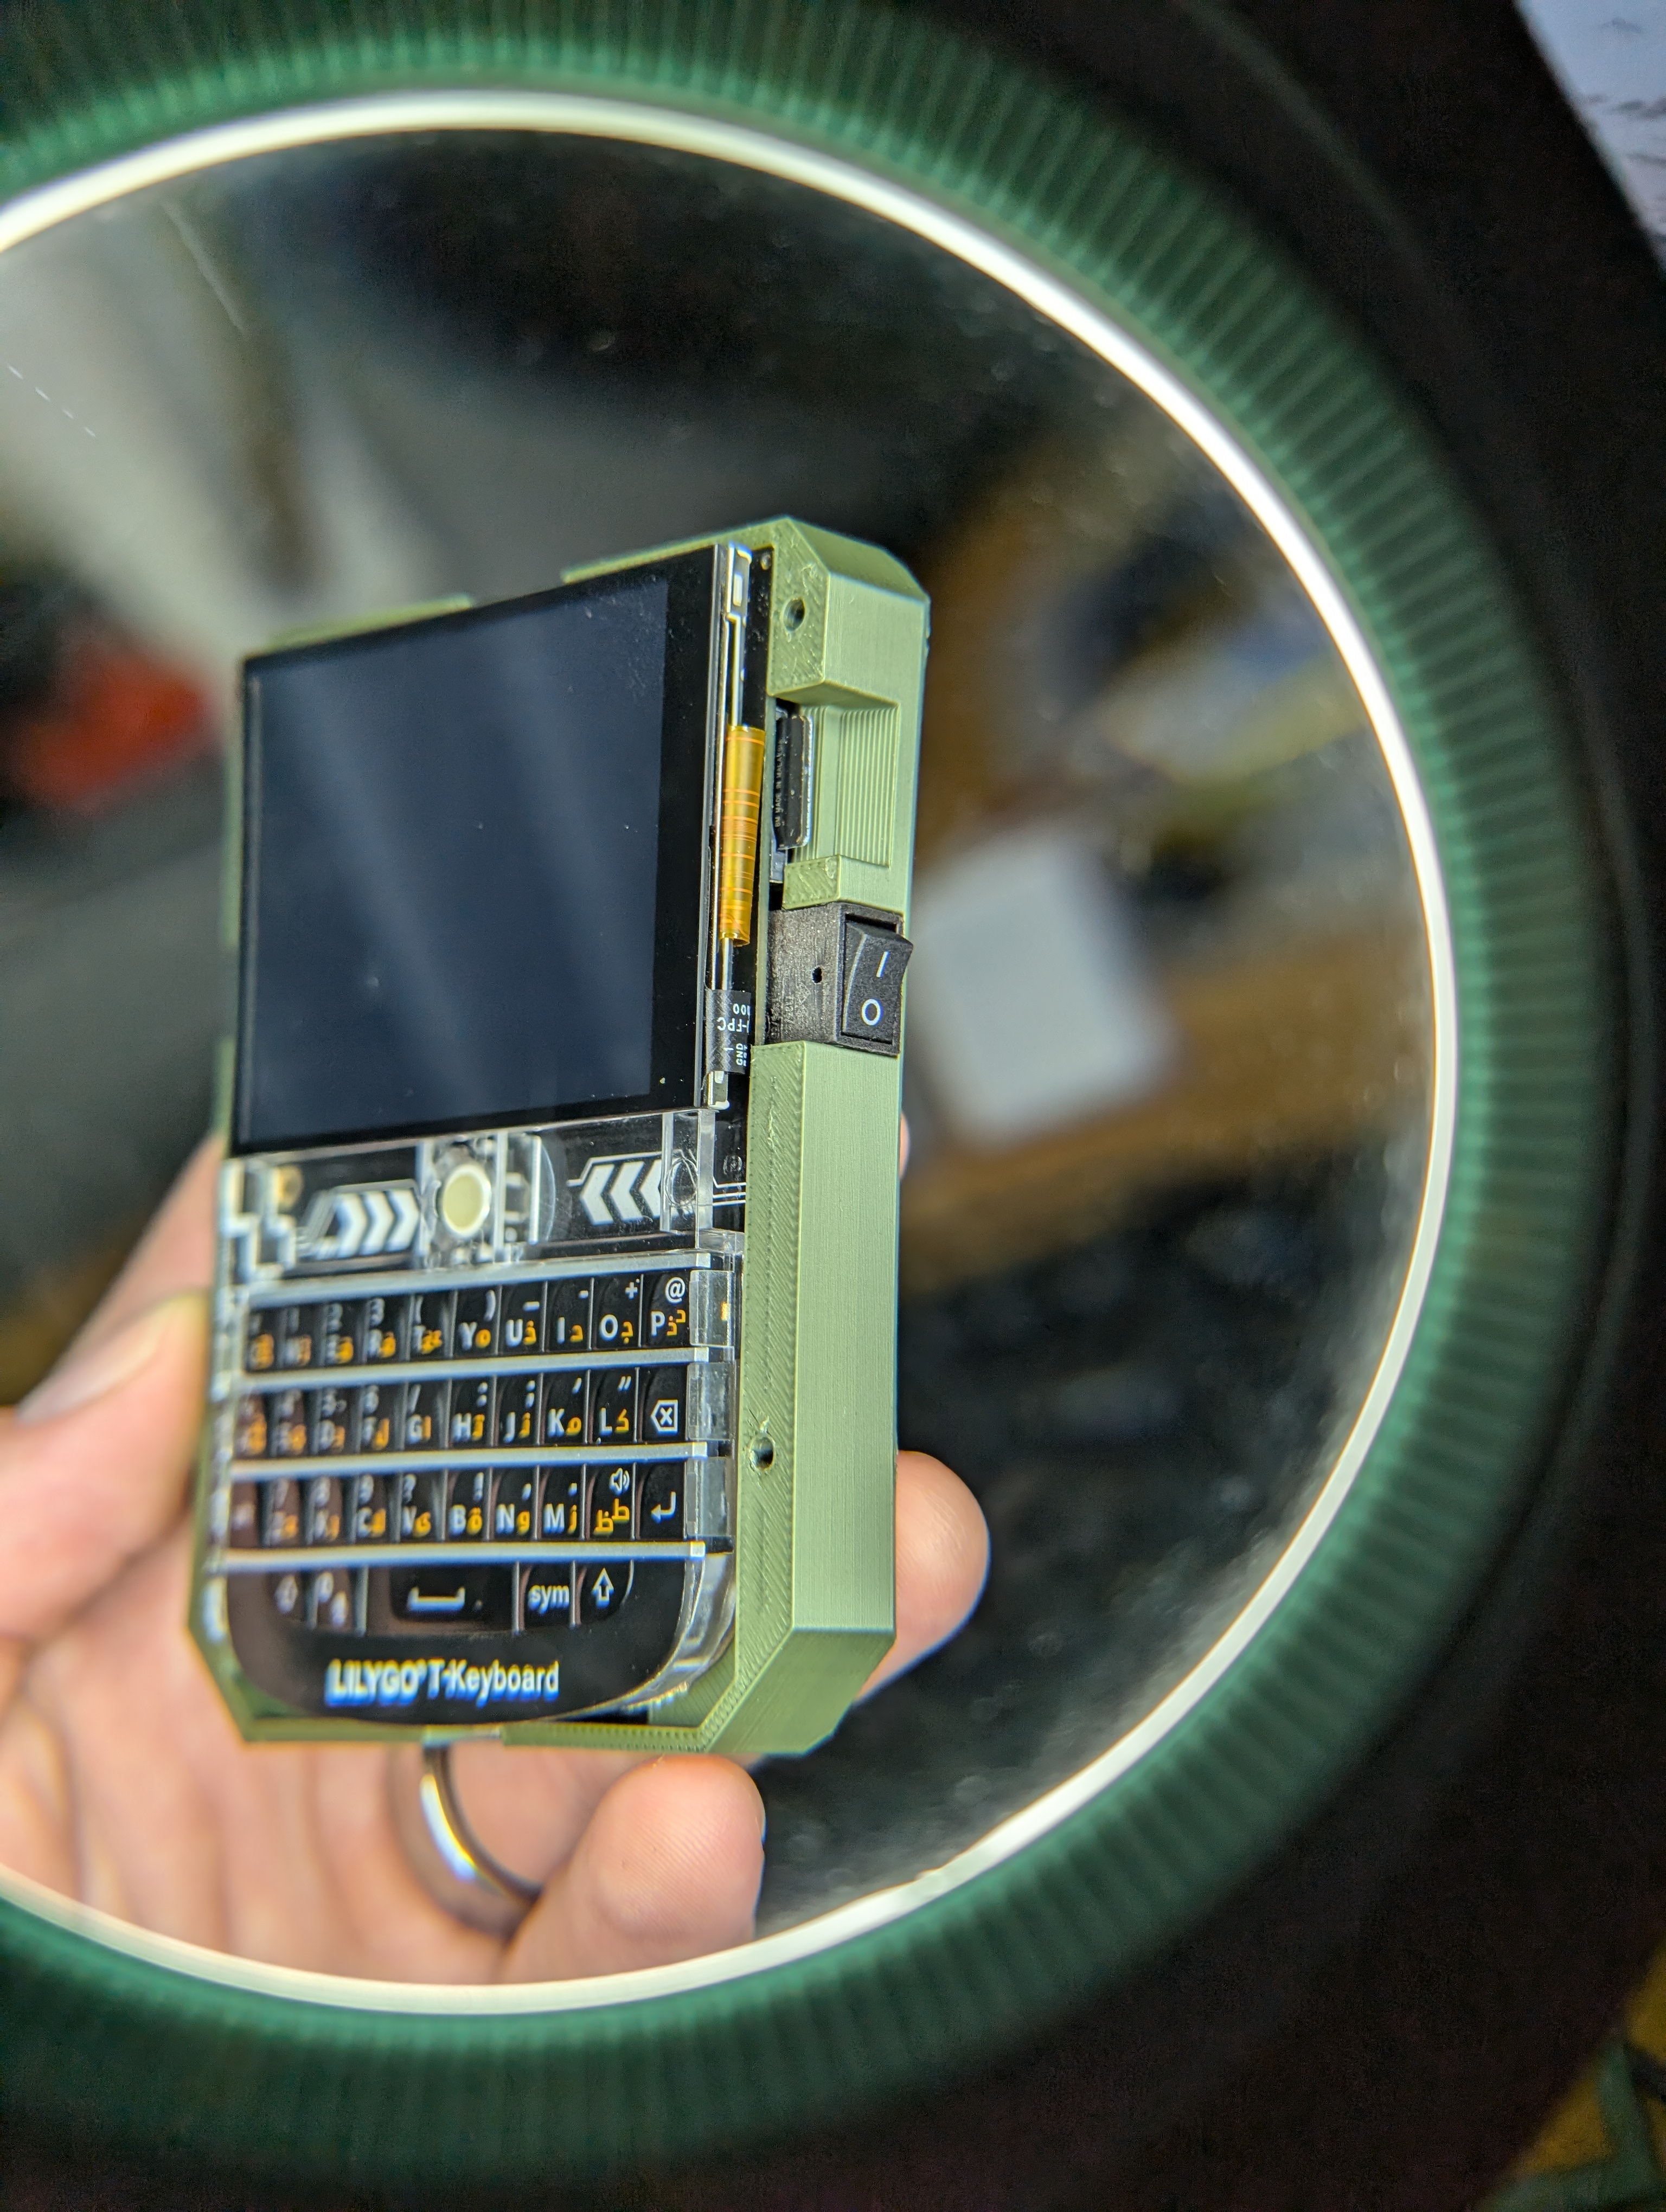
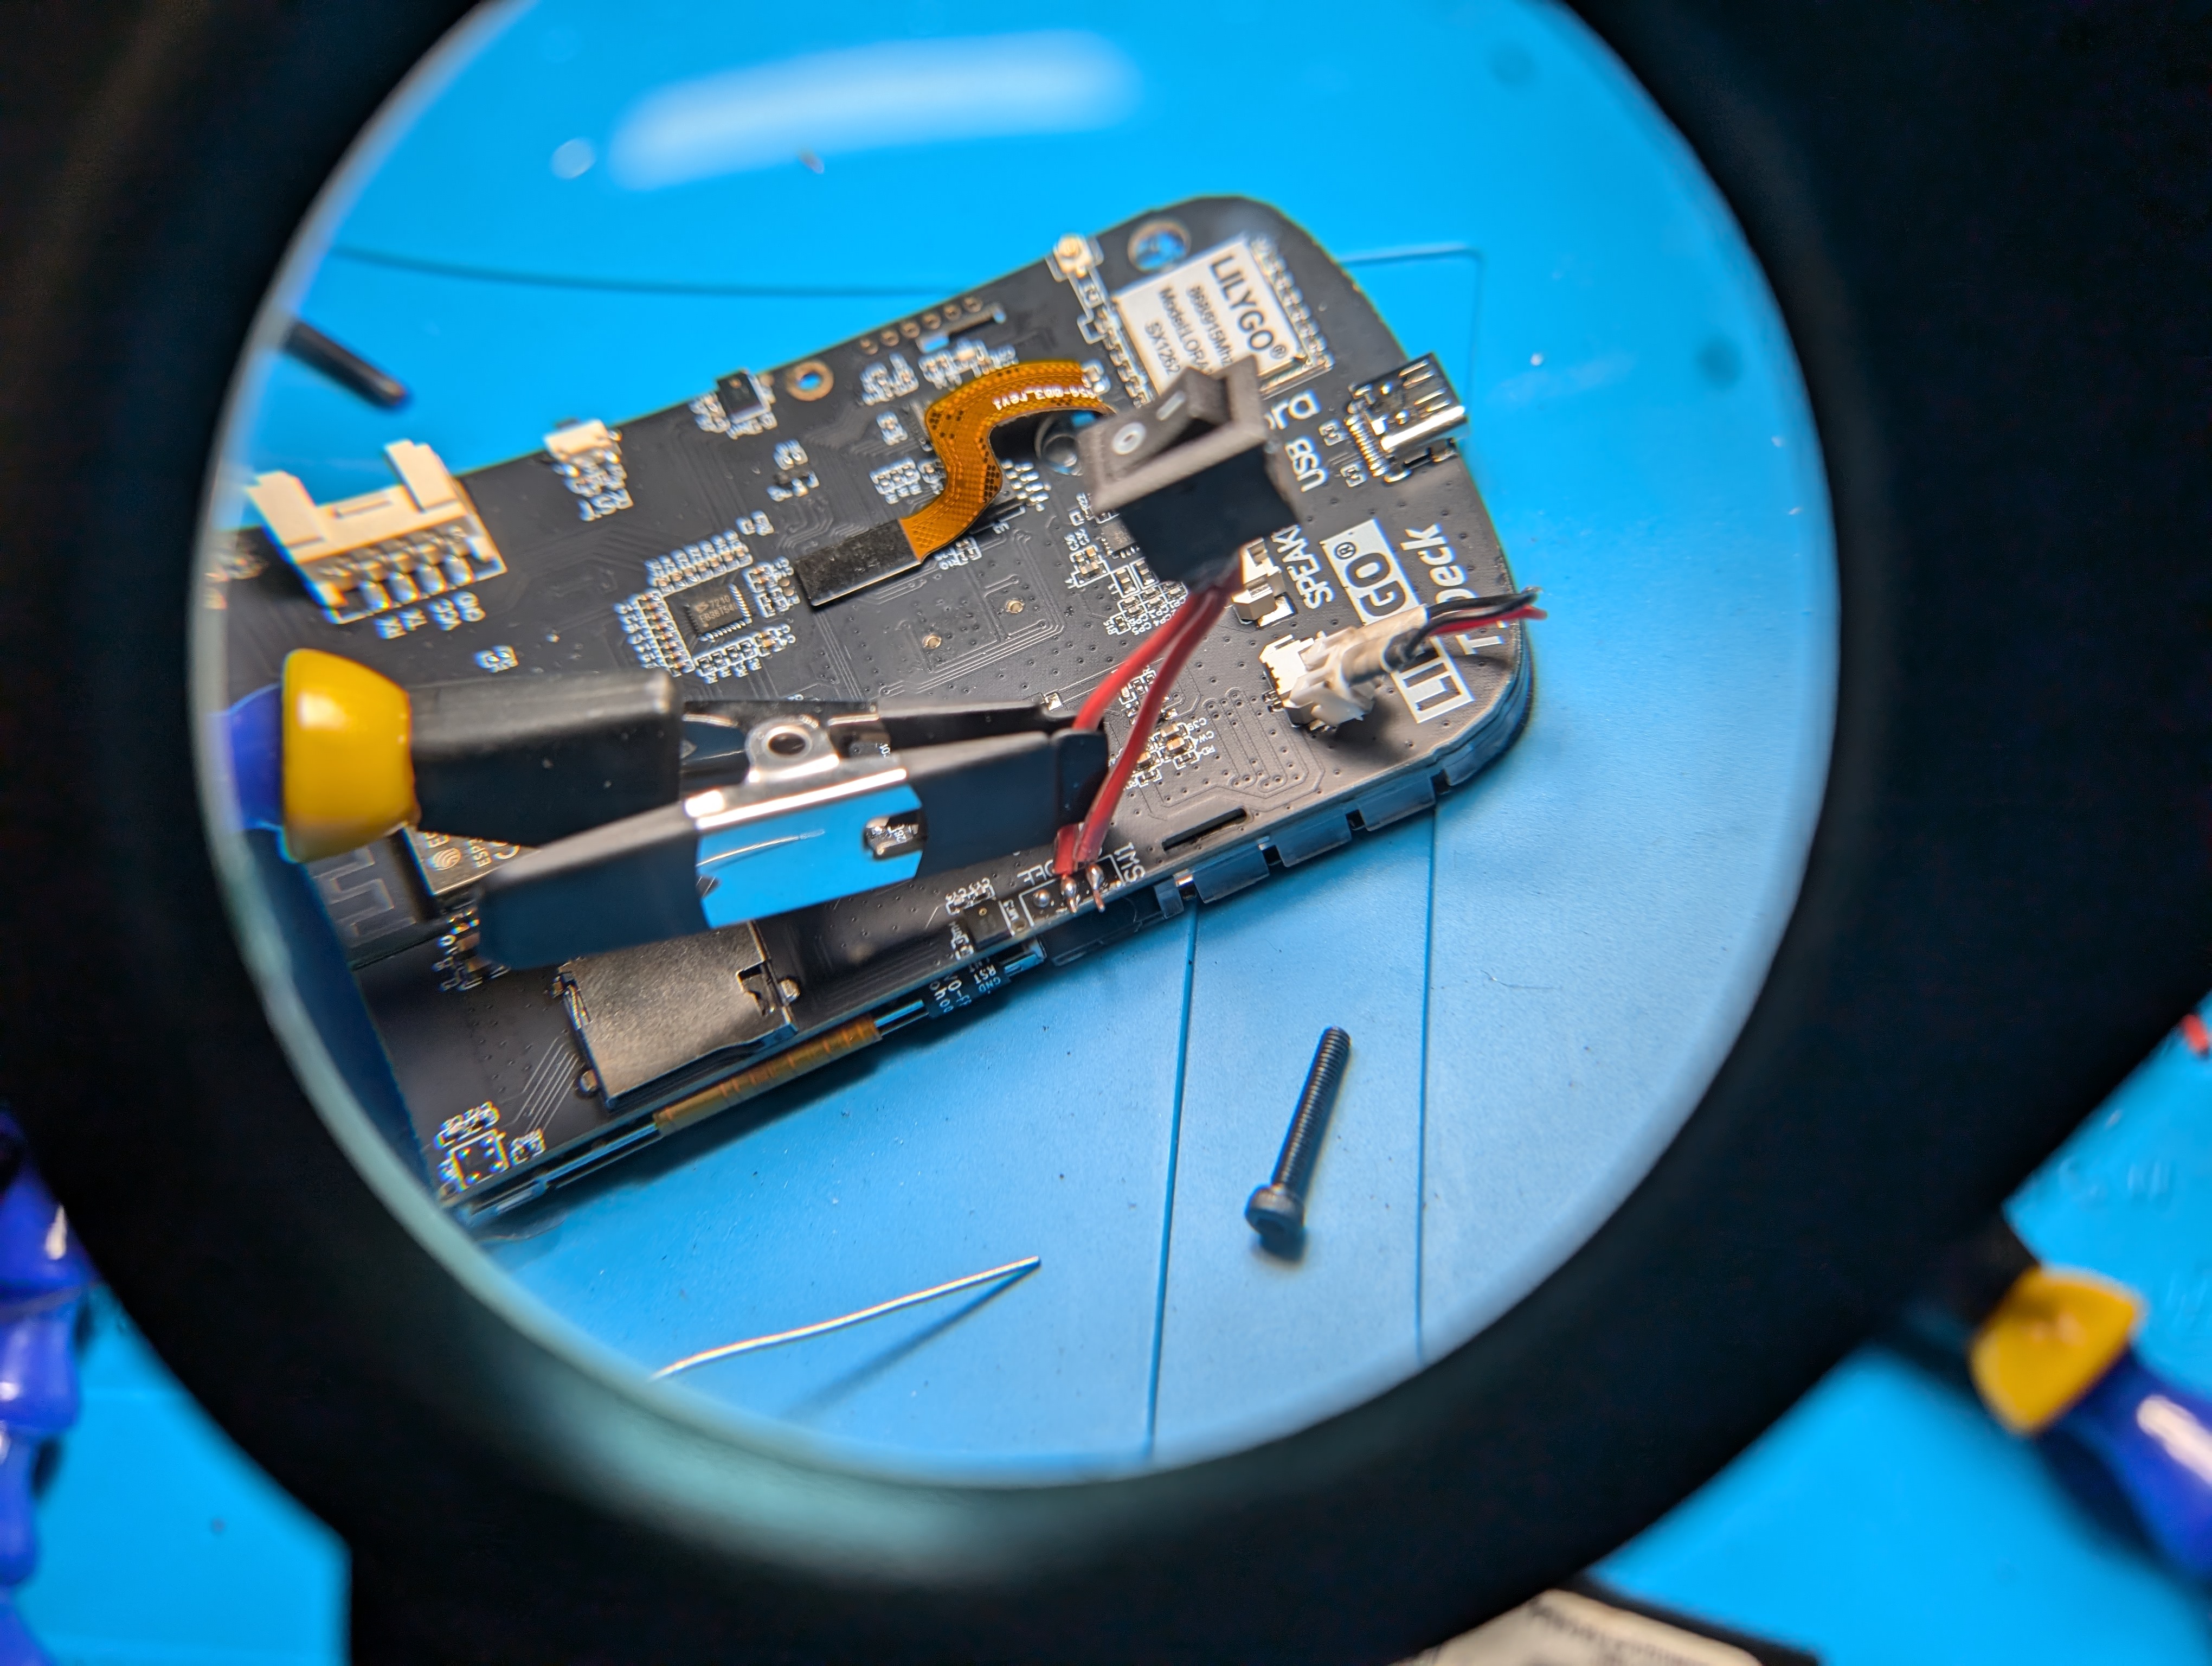
The case’s technical specifications reveal where the real engineering challenges lay. I squeezed in a 2000mAh battery, striking a balance between longevity and compactness. The power switch got a kid-friendly upgrade, now featuring a satisfying click that serves as a tactile reminder to turn the device off. A custom reset button extension was also added for those “have you tried turning it off and on again?” moments.
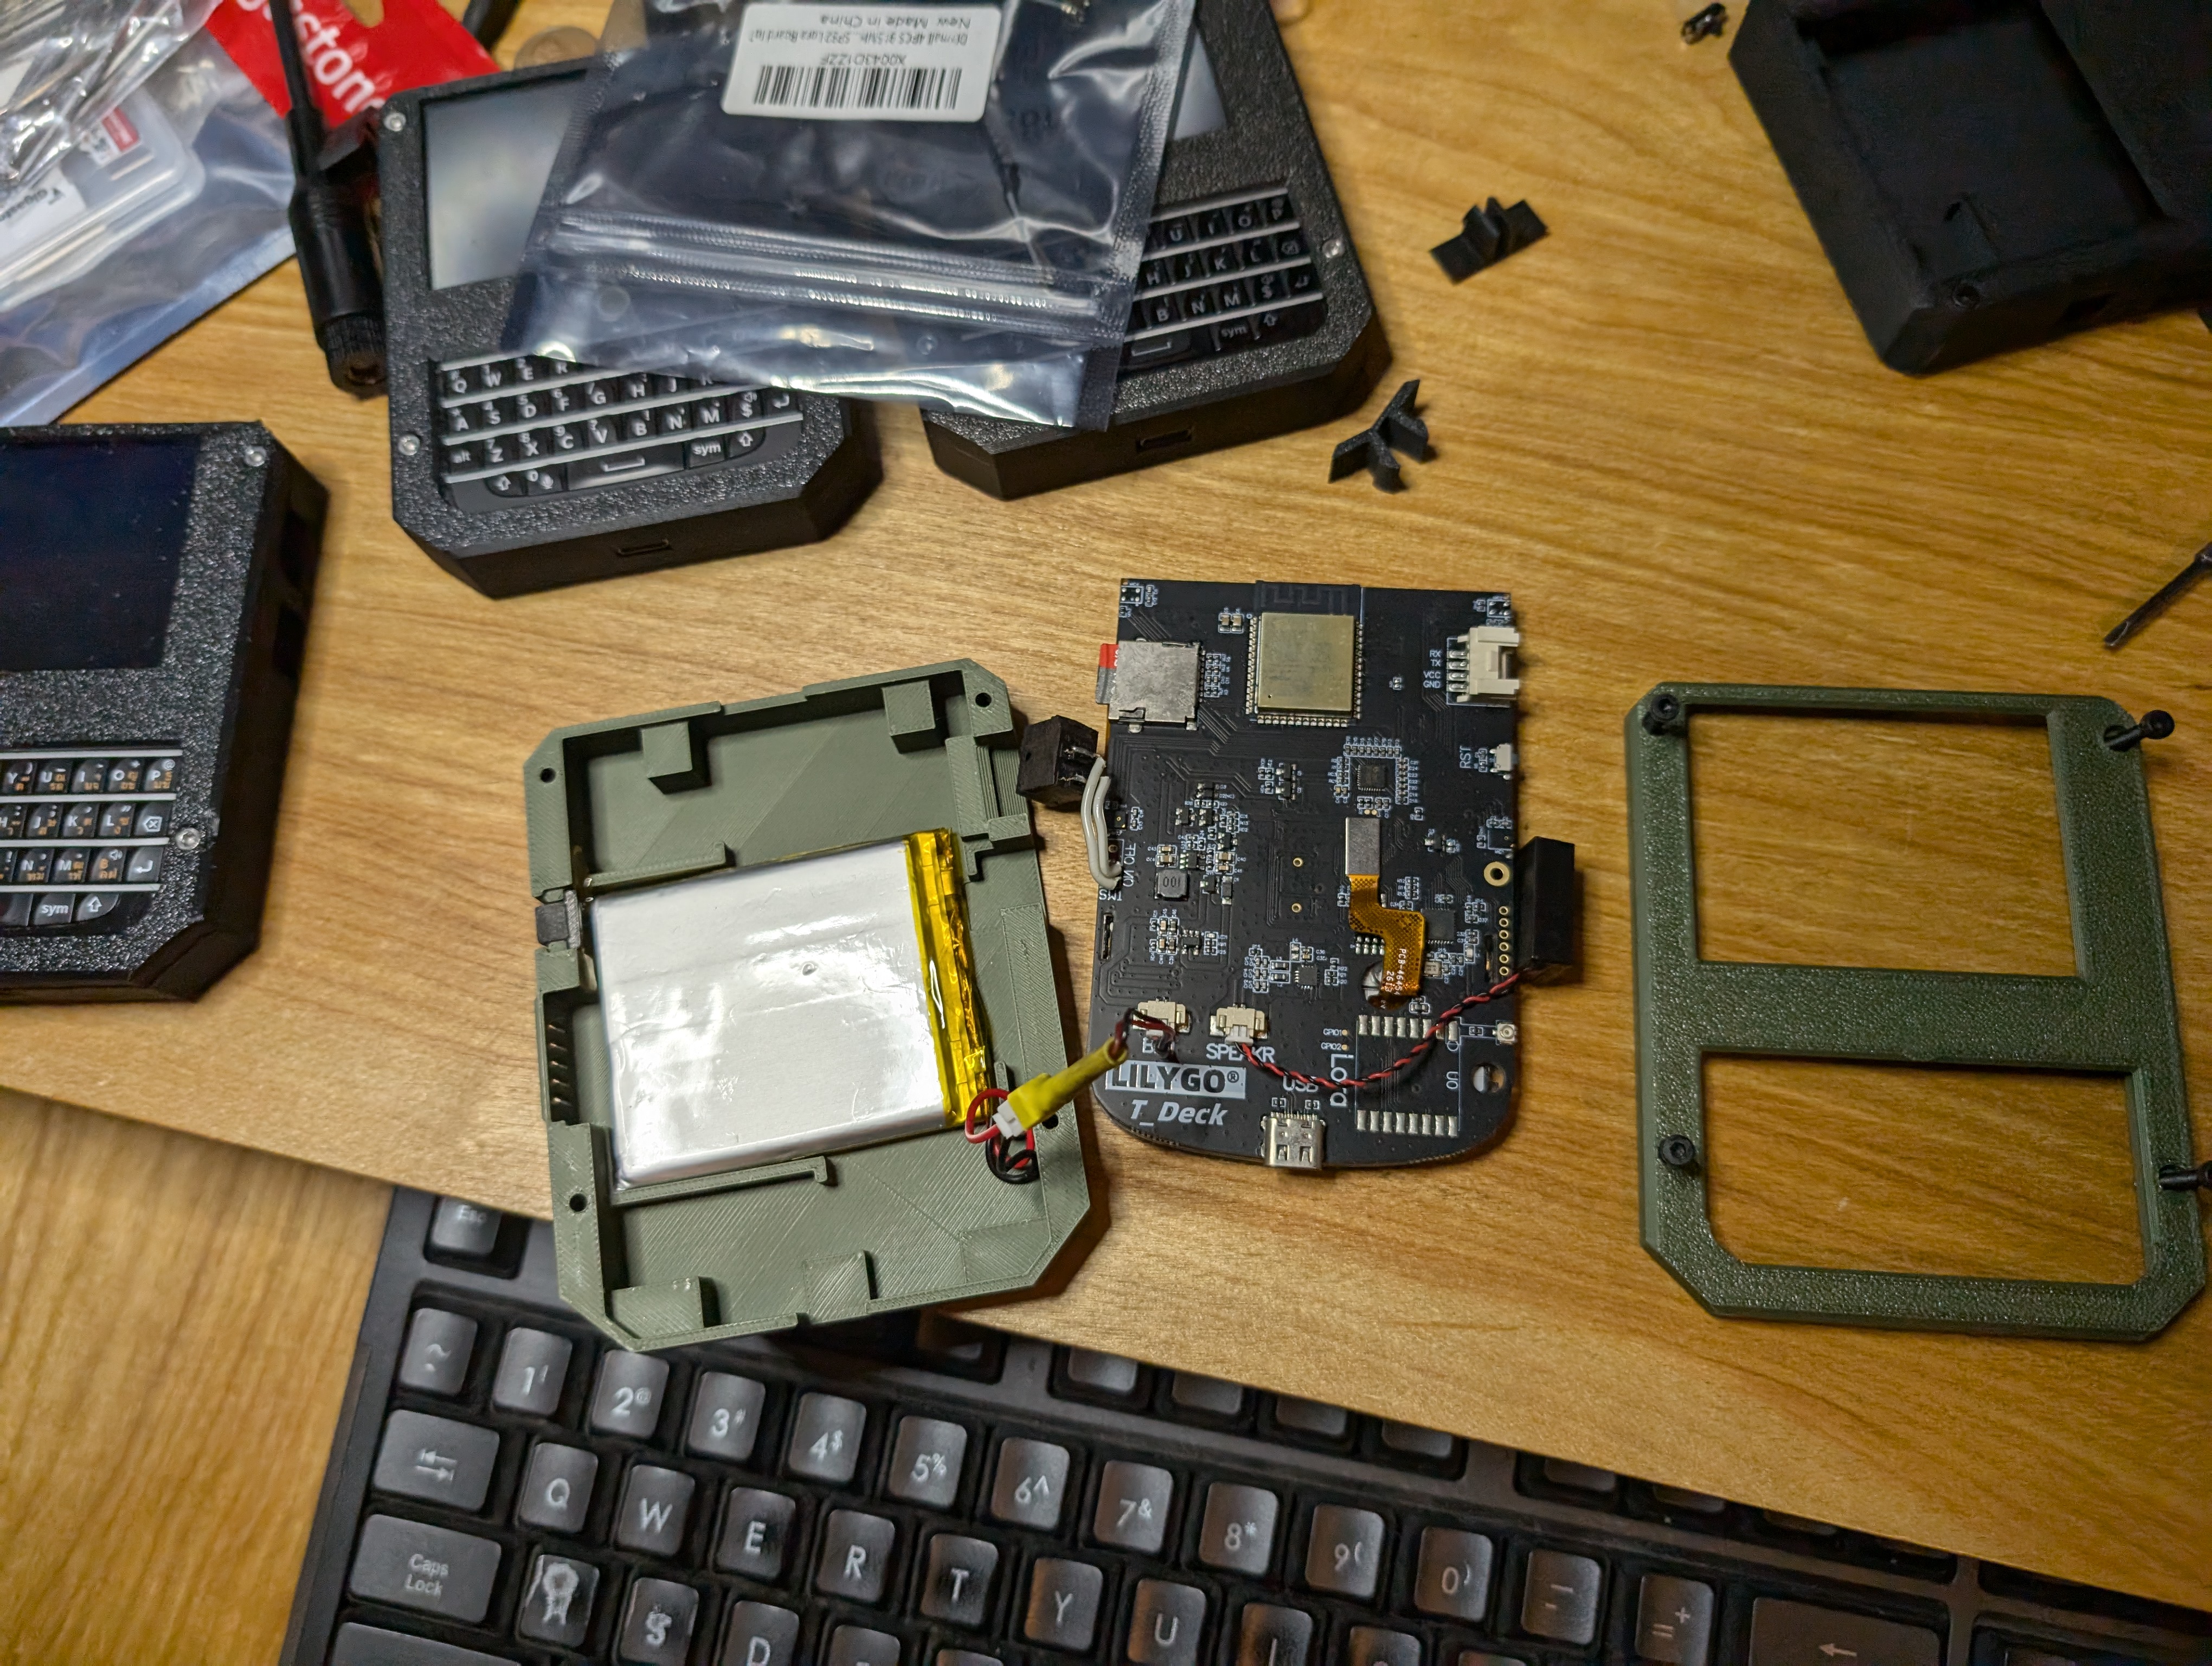
One of my space-saving tricks was relocating the speaker to the side, allowing me to reduce the overall depth and snugly fit the battery. The entire assembly is held together with four inset hex 2.5M 12mm screws in black. The screws are completely recessed to prevent scratching surfaces, while providing rock-solid structural integrity.
The case features rounded edges for safety, a textured grip surface to prevent slips, and a slightly raised bezel to protect the screen. Clear simple controls ensures intuitive use, crucial for my young tech enthusiasts.

The result? We’ve transformed the developer-oriented T-Deck into a robust, kid-friendly learning tool. It’s not just a device; it’s a personalized tech companion that my children are genuinely proud to use and show off to their friends. Who says educational tools can’t be cool?
Future Development Roadmap
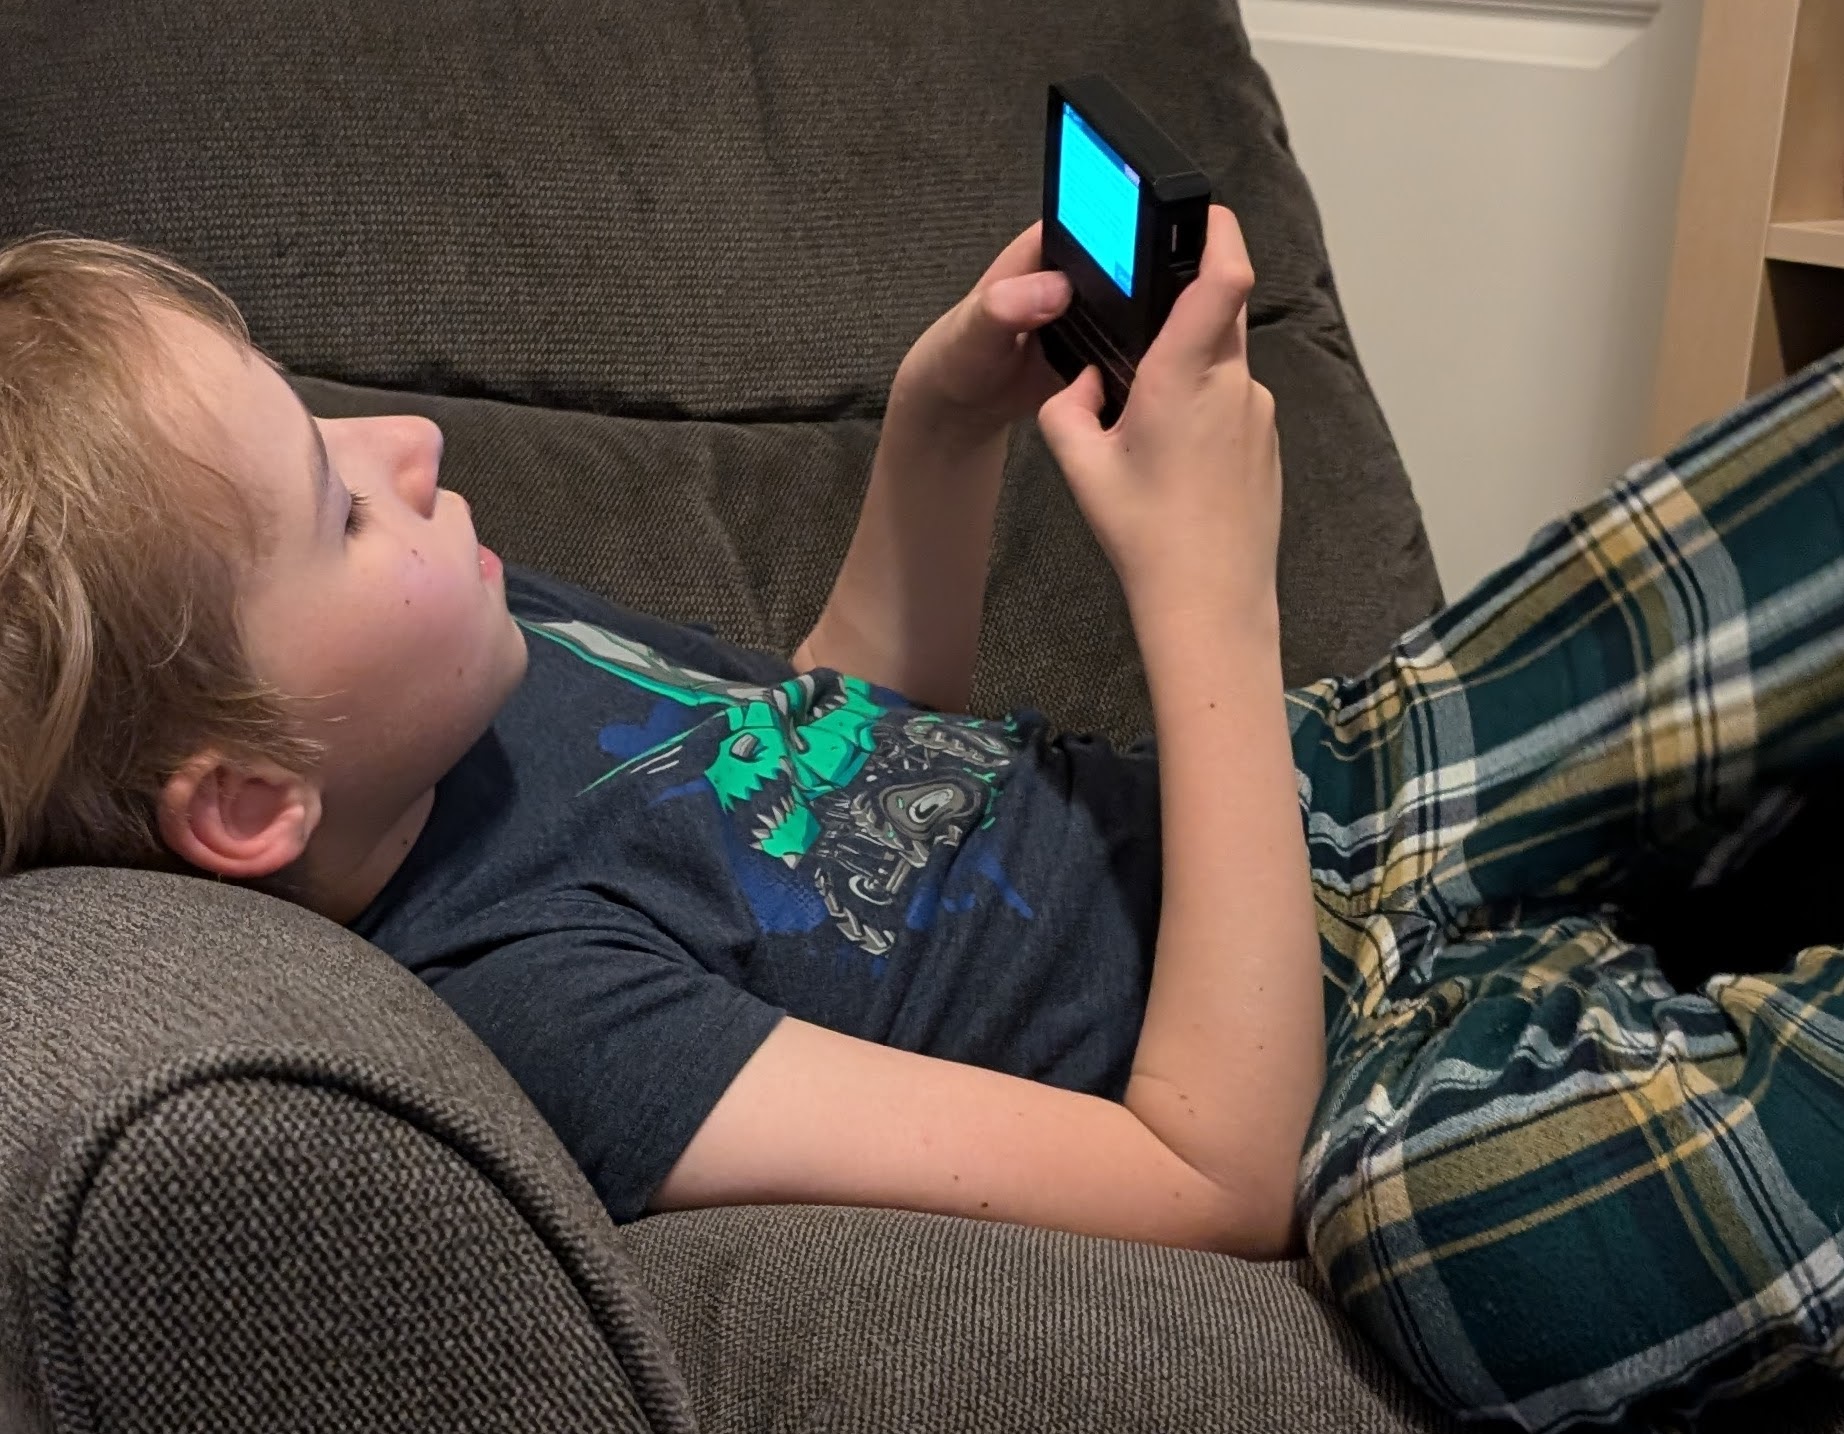
Did I hit my goals? I think so. Both boys regularly ask for their PocketGPT’s. The youngest for answering basic questions (mostly about foods) and the other tends to be asking questions about how to get past levels in his video games. They both kind of see it as their “device” since they dont yet have phones.
This interface for PocketGPT is designed with young users in mind, prioritizing simplicity, intuitiveness, and engagement. The interface balances functionality with child-friendly aesthetics. It’s about creating new ways for children to engage with AI and the world around them. As always in the maker community, I’m excited to share my progress and learn from others.
My main goal with these was to get them doing something fun and informative. They need to read and write in order to get it to work. I am looking at getting them comfortable in being able to clarify their meaning and improve their prompting skills. If they are asking the questions correctly they can find out almost anything.
My oldest son has long conversations about his video game information with it. At first he wasnt quite getting what he wanted out of it but I think he learned how to prompt it correctly and I remember exactly when he came in and told me that it had worked and gave him the directions he needed. He was super excited about it.
The boys can make it truly their own by renaming the threads and the entire interface is just the list of buttons and conversation and the form, but it gives them a lot to read and allows them to customize and save what they want.
Looking ahead, the flexibility of this setup opens up a world of possibilities. I can easily update our AI’s knowledge or behavior by tweaking the prompt or switching to more advanced models as they become available. It’s like we’ve built a device that can evolve and grow smarter alongside its young users.

In the end, this OpenAI integration is what breathes life into our little handheld device. It’s not just about having a powerful AI model; it’s about how we’ve tailored and implemented it to create a truly unique learning tool. Who knows? We might be nurturing the next generation of AI enthusiasts right here!
Expanding PocketGPT
While my AI-powered learning device is already getting a lot of use in our house, the maker’s itch never truly goes away. I’ve got some exciting enhancements planned that will take this project to the next level. Let’s dive into my immediate next steps:
LoRa Radio Communication
First on my list is implementing LoRa (Long Range) radio communication between devices. This low-power, long-range technology opens up a world of possibilities. One of the default T-Deck builds comes with a LoRa radio and this would allow for device to device messaging at a considerable distance for the boys. From the neighborhood park to our house is definitely in range. Giving them the ability to essentially chat back and forth on the device also gives them real world communication experience.
Captive Portal for Device Configuration
Next up is developing a captive portal to simplify device configuration. This web-based interface will allow users to set up and customize their devices without needing to dig into the code. I’m planning to include features for OpenAI API key configuration, Wi-Fi network setup, Assistant selection, and device nickname assignment. This addition will make my project much more accessible to other maker parents who might not be as comfortable with command-line interfaces. It’s all about lowering the barrier to entry and spreading the joy of AI-powered learning!
That is it! Thanks for taking a look at my project!
You can connect with me here on Twitter where I regularly post about AI and tech:
@contractorwolf
background artwork provided by instagram artist:
@eye.candy.ai

more pics of the devices/screens/build


Setup for deploying to the Lilygo T-Deck
This is only for those that may be trying to deploy to the T-Deck from VS Code or Arduino
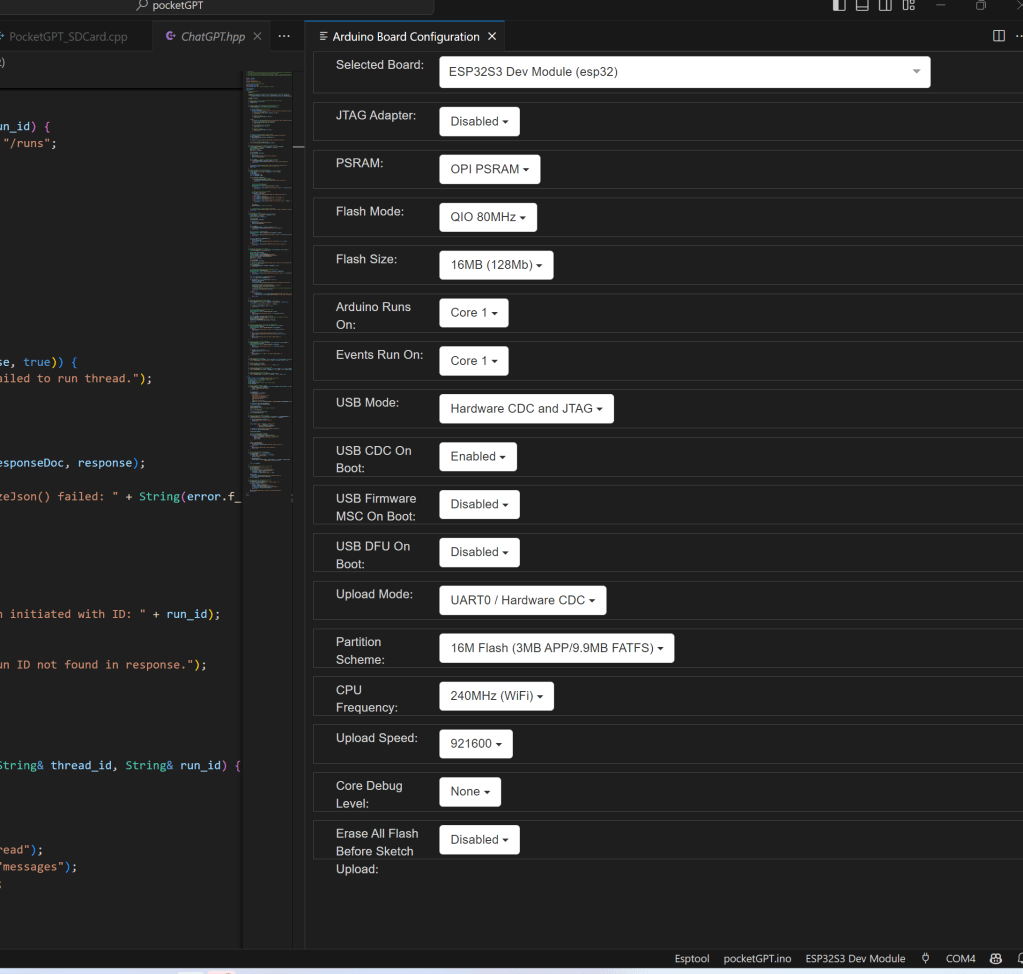
vscode setting for usb debugging
I used the setting to the left to setup VS Code connecting to my T-Deck for deployment and debugging. The COM port was different for each device that was connected for the first time. I pulled these values from the T-Deck documentation for the Arduino IDE (below)


Love this you are thinking big my friend!
Super cool. Any plans to open source? How much does it cost to run each a month?
hi please link your file .ino and stl realize your project for my cildret thanks
my email is : stagni.leonardo@gmail.com send all file please thanks