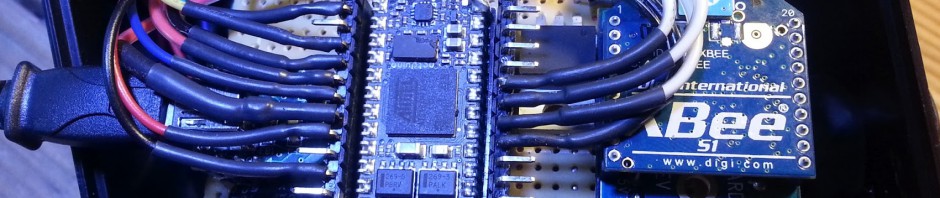
Last week I got the Mint-Duino kit from Radioshack in order to learn more about the Arduino. I am kind of obsessed with making these boards as small and simple as possible so, after following the directions of how to build the Mint-Duino on a breadboard, I set out to remove as much as possible and see what it really needed to run. After a bunch of reading online I concluded that I could get away with just having the power (5v and GND), the connection to a programming FTDI chip (I am using the UB232R) and the 16 mhz crystal.

The UB232R chip is nice because it is cheap ($17), breadboard friendly and very small. With just 5 wires I could use it both for programming and communicating with the Arduino, as well as providing power. I tested my wiring design first on the breadboard to establish that those minimum components would run the Arduino, then set out to design a way to put it on a single sided PCB. I usually start out with a piece of paper and look for ways of connecting the components so that the trace lines never have to cross. This process usually takes some time, but with this few parts I was confident that I could do it.
After several revisions of designs I came up with the following design:

The most important pins that must be connected are the 5v and the GND pins from the UB232R to the 5v and GND pins on the Arduino. With just these (and the crystal) the Arduino can run whatever sketch that you have loaded. The Arduino has two of each (one set per side). The 5v pins are pin 8 and pin 20, while the GND pins are pins 8 and 22. In my circuit I run the 5v rom the UB232R to pin 7 and then underneath the Arduino to pin 22. The trace for GND runs almost all the way around the circuit.
The UB232R allows me to establish a serial connection to the Arduino as well as reprogram the chip. The TX and RX pins on the UB232R are pins 8 and 7 and connect to the opposite pins on the Arduino, like so:
| UB232R | Arduino | |
| TX | -> | RX |
| RX | -> | TX |
The trace lines will run under the UB232R to the Arduino on the single sided PCB here:
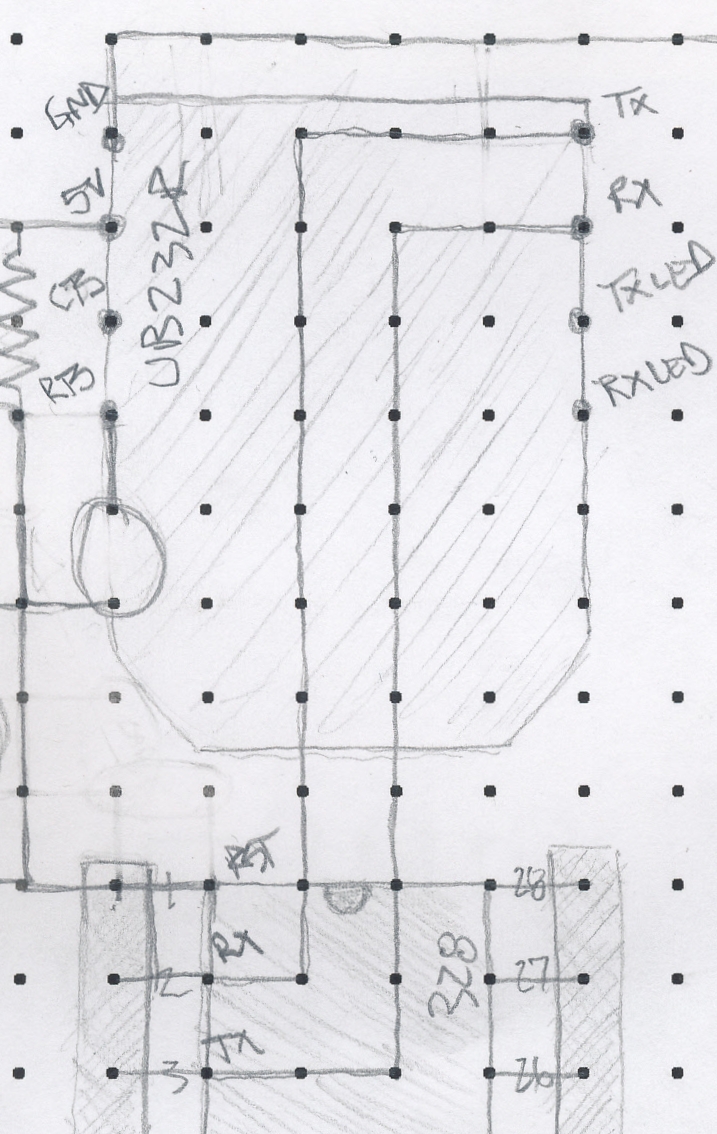
To program and reset the board a connection must be made from the RTS pin (pin 4) on the UB232R to the Reset pin (pin 1) on the Arduino. The Arduino expects a positive voltage on the reset pin when running and will reset (start over) if the pin is grounded. This is why in my design a small charge is provided through the 10k ohm resistor. The switch also allows me to ground the reset pin and perform a manual reset (if necessary). The final pins that are required to run the Arduino are the ones coming off of the crystal (with the 22pF capacitors) attached to pins 9 and 10 on the Arduino.

As a sanity check I also included the red LED attached to the 5v pin 20 through a 220 ohm resistor to be able to see that the Arduino has power.
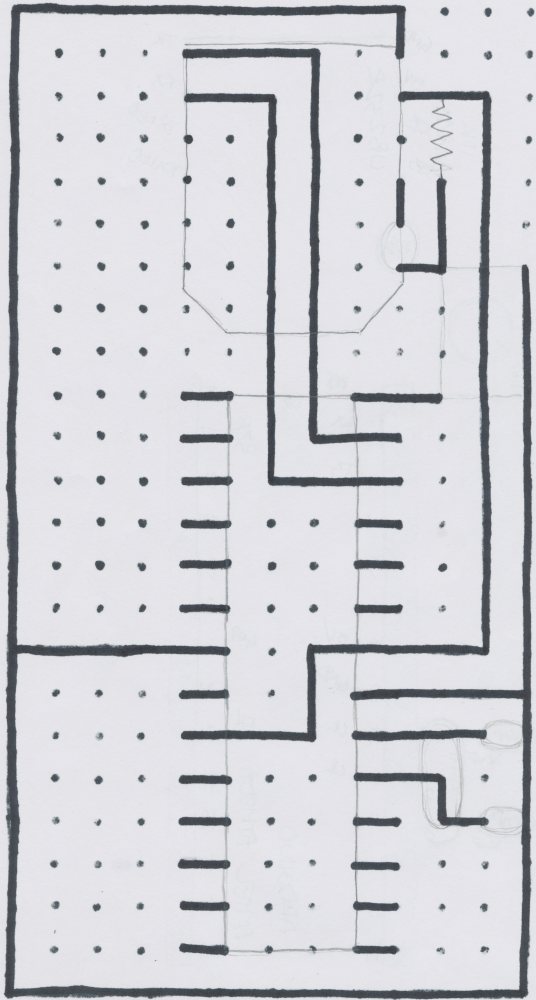
Single Sided PCB on Proto-board
I like to think that the perfect way to design a board is one that has only one side of “traces” and all the connections can be made. I figure out a way that I can set the legs on a grid so that no connections are crossing and simple “though hole” components can be mounted. The design in the drawing above shows just that. I then use a black marker and draw where the traces will lie in order to make all of my connections. I use the black marker because it allows me to flip over the completed design and then have a road map for the traces I will have to lay in solder. Here are the bottom of the design after tracking the lines in black, next to the final solder version, notice how they match.

[I will post some more info here later]
Here is the video of me testing it:
