
I have been playing around with the Arduino for a few months and one of the things I wanted to build was a nice temperature monitor with a simple screen. I have the Arduino Uno board and had a GHI Electronics LCD Button Shield that I thought I could use. After playing around with connecting the Arduino to the LCD Shield I found that I could control it and even use the buttons (with some slight tweaks to the logic that is used in the standard Arduino Button Shield logic). I had also previously purchased one of the Sparkfun waterproof temperature probes and went through the trouble of installing the resistor inline as recommended here:
http://www.hacktronics.com/Tutorials/arduino-1-wire-tutorial.html
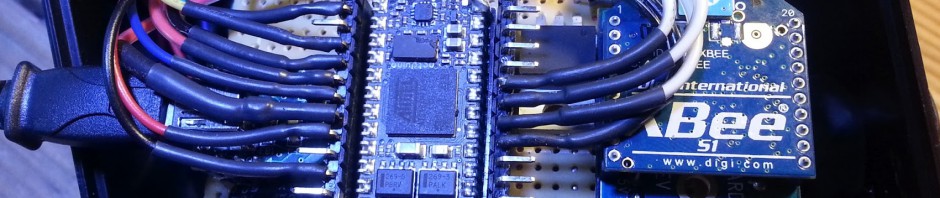
This is how I have it wired to the Arduino (using the LCD Shield pins as mounting points):

I have the resistor and the solder connections in the shrink tube here:

The probe itself can be pruchased at Sparkfun:
https://www.sparkfun.com/products/11050
I also had to make sure I knew the address of the probe, but they also have a nice tutorial for getting the address of your probe here:
http://www.hacktronics.com/Tutorials/arduino-1-wire-address-finder.html
To run the LCD Button Shield I used the simple LiquidCrystal code I found here:
http://www.hobbytronics.co.uk/arduino-lcd-keypad-shield
It should work with any of the Arduino Button Shields.
The final code I used is here:
// This Arduino sketch reads DS18B20 "1-Wire" digital

// temperature sensors.

// It also uses the LCD button shield which needs the LiquidCrystal Library available here:

// http://arduino.cc/en/Reference/LiquidCrystal

// Tutorial:

// http://www.hacktronics.com/Tutorials/arduino-1-wire-tutorial.html
#include <OneWire.h>
#include <DallasTemperature.h>
#include <LiquidCrystal.h>
// initialize the library with the numbers of the interface pins
LiquidCrystal lcd(8, 9, 4, 5, 6, 7);
// Data wire is plugged into pin 3 on the Arduino
#define ONE_WIRE_BUS 3
// Setup a oneWire instance to communicate with any OneWire devices
OneWire oneWire(ONE_WIRE_BUS);
// Pass our oneWire reference to Dallas Temperature.
DallasTemperature sensors(&oneWire);
// Assign the addresses of your 1-Wire temp sensors.
// See the tutorial on how to obtain these addresses:
// http://www.hacktronics.com/Tutorials/arduino-1-wire-address-finder.html
// this is a unique sensor Id and will be specific to your sensor, use the link above to discover the Id of your sensor
DeviceAddress tempProbe = { 0x28, 0xB0, 0x0C, 0x37, 0x04, 0x00, 0x00, 0x68 };
//holds the latest temp reading
float tempF;
void setup(void)
{
// start serial port
Serial.begin(9600);
// Start up the library
sensors.begin();
// set the resolution to 10 bit (good enough?)
sensors.setResolution(tempProbe, 10);
// set up the LCD's number of columns and rows:
lcd.begin(16, 2);
//set the cursor to first row, first character
lcd.setCursor(0,0);
//show which version of software it is running
lcd.print("LCD:TempProbe v1");
}
void printTempSerial(float temp)
{//sends temp info to serial port
Serial.print("Probe temperature is: ");
if (temp < -100) {
Serial.print("Error getting temperature");
} else {
Serial.print("F: ");
Serial.print(temp);
}
Serial.print("\n\r\n\r");
}
void LCDTemp(float temp)
{//send temp info to LCD shield
//first character, second row
lcd.setCursor(0,1);
if (temp < -100) {
lcd.print("Error: check connection");
} else {
lcd.print (temp);
lcd.print (" Fahrenheit");
}
}
void loop(void)
{
//gets all temp probes on bus (i.e. pin 3)
sensors.requestTemperatures();
//get the temp of a specific sensor on bus by unique probe Id
tempF = sensors.getTempF(tempProbe);
//send temp over serial debug
printTempSerial(tempF);
//send temp to LCD display
LCDTemp(tempF);
//wait 2 seconds to next reading
delay(2000);
}

Hello thank you for the code for the temp sensor.when I first ran it it went fine but now it says error check com which I did and its on com 4 which is checked then it displays temp at 32 f and stays there….any idea what I may be doing wrong?
Thanks in Advance
@geoff are you using a screen with yours or are you just displaying the data via serial? If you dont use a screen then I would suggest trying to comment out all the LCD code.
Hi James just got back to this project and uploaded the code once again and it works just fine,thanks very much.I was just wondering how I could add a piezo to this code to add an alarm at a given temp.Trying to build a fish locator…at the ideal water temp.
Thanks In Advance
Geoff
Yeah yhat would be pretty easy, just add an if statement after you get the temp.
If the temp is above your threshold, ring the piezo.
Thanks James
Cool!
hallo nice work ! do you think a ph probe can be instald to? so you can watch temp and ph ?
Yeah shouldn’t be too much of an issue, although the pH sensors (dfrobot.com) seem to have a much more complex interface. But it would certainly work.